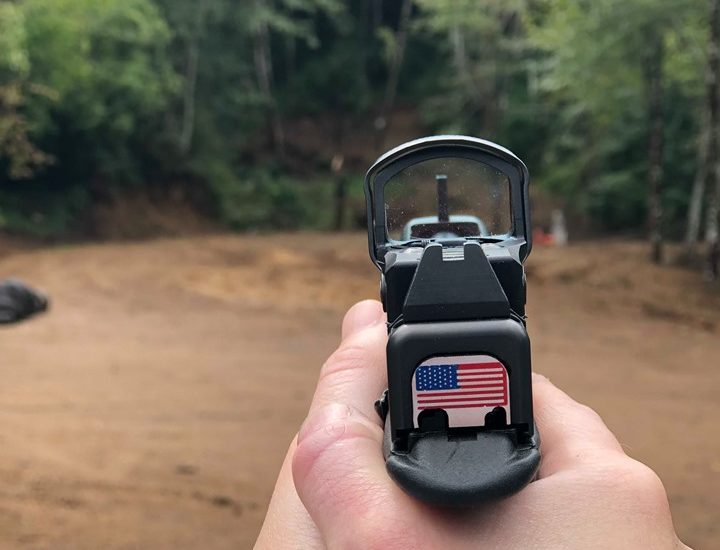
A Beginners Guide to Building an AR15 Part 4
In our first three parts of this article we made a plan of what we were going to build by determining the intended purpose of the AR15. We assembled our tools and we assembled our parts along with some safety equipment.
Now that you’ve got all your tools, your space, and your parts together, it is time for assembly.
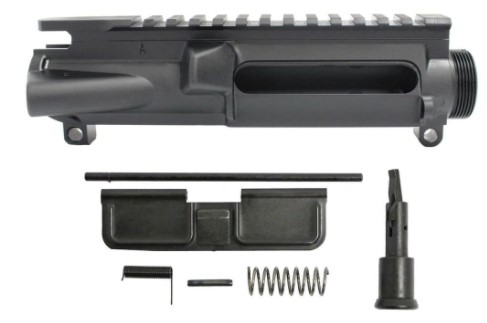
Upper Receiver
Get your parts and tools together on your mat. You are going to need your forward assist, forward assist spring, roll pin, 5/64 punch, small mallet, and your blank upper receiver.
INSTALLATION OF FORWARD ASSIST
Use the roll pin punch and seat the roll pin just enough to start it without protruding.
Place the forward assist in with the spring on the body. Push the forward assist in place and press down. Finish tapping the roll pin in so that it captures the forward assist and seat it smooth so that it does not protrude. Jump to 3:04 in the next video to start on the upper receiver’s forward assist installation.
INSTALLATION OF DUST COVER
Next, install the dust cover. You have 4 separate pieces, and it can be a pain to assemble so that the spring has the correct tension on it. Start the pin, put the assembled cover in place so that the leg of the spring is on the correct side and under tension. Slide it in from the barrel side! Once you have it all captured and in place, install the retaining clip by pressing it into place with a pair of needle nose pliers. If that does not work for you, buy a one-piece unit that’s ready to go!
INSTALLATION OF GAS BLOCK AND GAS TUBE
Now get your bench block, gas block and gas tube along with the appropriate roll pin. Start the roll pin into the gas block with your roll pin punch but do not go too far. Slide the gas tube into the gas block making sure you orient the holes correctly. If you do not align the gas correctly, your firearm will only shoot once! Finish tapping the roll pin in place until it is flush on both sides.
To do this job correctly, you NEED to dimple the barrel if it isn’t already! This is a gas operated system and requires this component to work! Some barrels that you purchase will be dimpled by the factory and many are not. You can freehand it like the video demonstrates or you can buy a jig that helps you accomplish this task perfectly. I prefer the jig as I don’t trust myself to free hand it. Be sure to use some medium strength thread lock as well. You need the gas block to stay in place throughout use!
If you don’t get this part right, you might as well be using a bolt action rifle, it will only fire one round and you’ll have to manipulate the bolt by hand.
INSTALLATION OF THE BARREL
Get your barrel and clean the extension at the lug end. Next, clean the barrel extension on your upper then place some anti-seize on the barrel extension that will go into your upper. Put some on the threads of your upper as well. I like using a cotton swab to put this in place and less is usually more. You are trying to prevent corrosion so this thing is capable of coming off someday if you need to.
Use the indexing bump on the barrel and slide it into your upper. This is where you will want to use your vice and upper vice block. Place a small amount of anti-seize on the inside of your barrel nut as well.
Slide your barrel nut on and tighten it to 30-60-foot pounds but be sure to follow your manufacturers specific recommendations for the parts you purchased. After doing a few of these you will tighten closely to the right foot pounds by feel. Until then, here is where you want to use the torque wrench. Tighten it, loosen it, tighten it, loosen it, tighten it in the correct range with the torque wrench until it is aligned for gas tube alignment.
Some barrel nuts use thin washers to help you get it to the correct tightness with it clocked exactly right for gas tube clearance. This will be specific to the brand of barrel nut and handguard that you purchase. Be sure to follow your manufacturers recommendations.
MUZZLE DEVICE INSTALLATION
Install your muzzle device. Use your reaction rod to hold your upper in place. The reaction rod places all the torque you are going to apply onto your barrel and not your upper. Place crush washer on the end of the barrel with the washer in the correct direction. It should be concave towards muzzle. If your muzzle device has an indexing point, tighten it to that point to the correct foot pounds.
If you’re using a muzzle device that doesn’t use a convex washer but instead uses a series of washers at different thickness, it will be a series of trial and error until you get it just right.
HANDGUARD INSTALLATION
Slide the handguard on. Make sure it is fully seated onto your upper and that the rail on top lines up!
Tighten the handguard to the barrel nut following that specific brands directions. BE SURE TO USE THREAD LOCK! A quality medium strength thread lock should be used on the screws during installation unless the specific brand product your using has an alternative way of making sure the screws don’t back out. This is another place of heat and cooling and vibration that could cause things to come loose.
Be Sure to come back for Part 5 where we continue the installation of parts on your upper.
If you are just now finding this article, go back and check out parts 1, 2, and 3.