Your Pistol Mounted Optics Hidden Narrative: Discover Your Pistol’s True Trajectory
Let’s talk about getting your pistol’s red dot dialed in, but with a twist! For years now, the go-to method for zeroing a pistol-mounted optic, especially in the self-defense and law enforcement world, has been a straightforward 15-yard zero (or a similar, preferred distance). And hey, there’s nothing inherently wrong with that! It’s simple, quick, and gets your shots on target for typical close-quarters engagements.
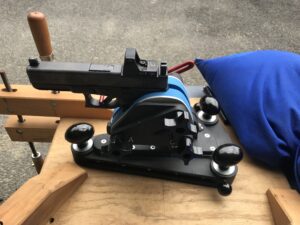
Using a product like the Ransom Rest can be a great place to start but it doesn’t tell the full story.
The traditional 45-foot zero is appealing for a few key reasons. It covers many common engagement distances, making it sensible to confirm accuracy there. Most indoor ranges are 15-25 yards, which makes accomplishing this zero quite easy. And for many, it offers a simplicity, a “set it and forget it” mentality that provides a quick boost of confidence.
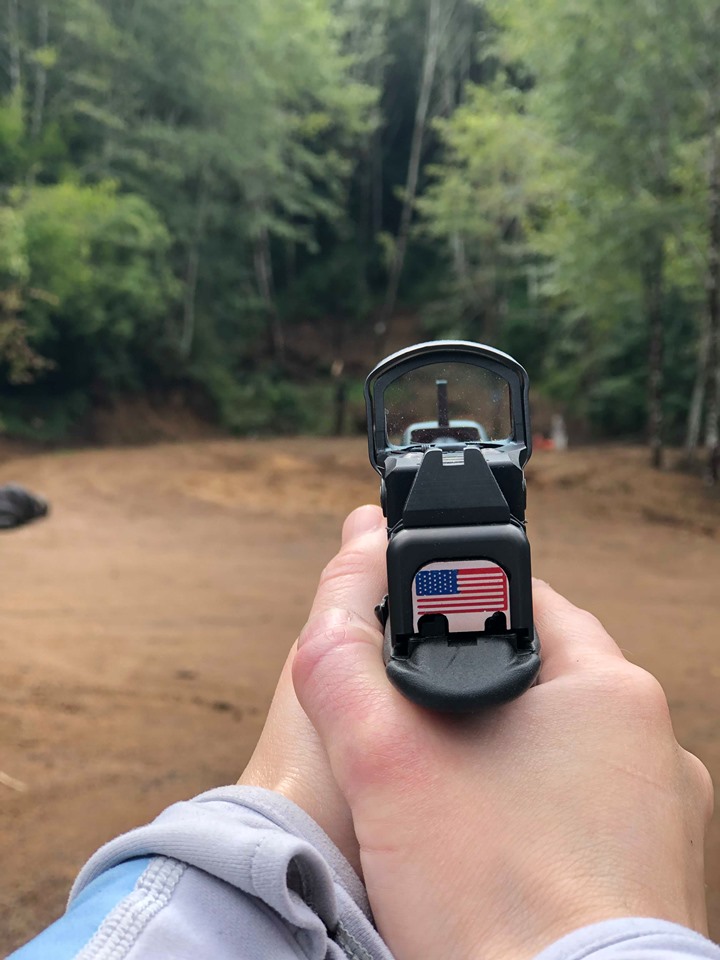
I’d typically set up my target 5 to 7 yards out, take my first shots on a small dot I drew with a marker, and make some hasty adjustments if needed. Then, I’d move to 15 yards (45 feet), take a few careful shots (usually about 5), adjust my optic’s windage (left/right) and elevation (up/down) until my bullet impacts matched my red dot, and then call it a day. I’m “zeroed” for 15 yards, and for many, that feels like a mission accomplished.
But what if I told you there’s a deeper story to uncover? This more advanced perspective suggests that simply “zeroing” your pistol at one distance is like reading only the first page of a thrilling novel. While that 45-foot zero is a great starting point, understanding your bullet’s “story” across a wider range of distances can unlock a whole new level of confidence and capability for self-defense and law enforcement applications.
Why go beyond the traditional 45-foot zero? The Benefits of the “Story” Approach
Imagine knowing exactly how your bullet behaves at 5, 15, 25, 50, 75, and even 100 yards. This isn’t about routinely making 100-yard pistol shots (though it’s good to know if you could if truly needed!). It’s about understanding your bullet’s full trajectory. Bullets don’t fly in a straight line. They follow a parabolic arc, rising to a “max point” and then falling as gravity constantly works on them. Understanding this full arc, especially your Max Point Blank Range (MPBR), means you can keep your red dot centered on a target and hit within an acceptable margin (like an 8–12-inch circle) across a much wider distance. No guessing, no complex holdovers.
This approach also offers adaptability in dynamic situations. Real-world encounters rarely happen at neatly measured distances. Whether I’m in a parking lot, an open area, or a crowded street, knowing my pistol’s “story” means I’m prepared for shots that might be much closer or much further than anticipated. There’s enhanced safety and accountability too; when every shot counts, having a deep understanding of my firearm’s performance helps ensure accuracy and minimize the risk of unintended consequences. For law enforcement especially, pushing the boundaries of equipment knowledge demonstrates a higher standard of care and preparation. Some of you might know this general concept as knowing your “D.O.P.E.”, Data On Previous Engagements.
Factors That Write My Pistol’s “Story”
Getting this deeper understanding involves looking at a few critical elements beyond just adjusting my optic. My gear matters. A loose optic is a useless optic. I always ensure my red dot is mounted securely, with fasteners torqued to the manufacturer’s specifications (Loctite and/or Vibra-TITE VC-3 thread lock is my friend!) and witness marks to easily spot any loosening. I even go a step further and “paint the window shut” on my screws before adding witness marks – applying a small dab of paint or lacquer over the screw head and optic body to create a visible seal. This way, any rotational movement of the screw will break the seal, providing an immediate visual cue that the screw is loosening.
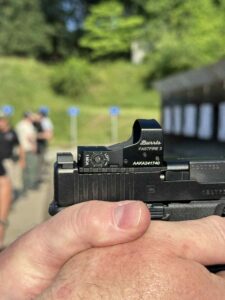
Proper Installation is essential! Too long of screws used here have created a lifted mounted plate.
I also recognize that I am part of the zero. Before I blame the optic, I ensure my own shooting fundamentals, most importantly my “platform” (grip, stance, trigger control) are solid. This is my “human zero.” If my fundamentals are inconsistent, my data will be too. While starting with a supported position (like a bench rest) can help establish a mechanical zero, ultimately, I need to understand how I shoot the gun from an unsupported, standing position, as that’s how it’ll be used in a real scenario. If I can’t shoot a solid group, I don’t have any data to be zeroing my pistol from!
Ammunition changes everything. My defensive hollow points will likely print differently than my cheap bulk ammo. For each ammunition type I plan to use, I need to develop its own “story.” Velocity and bullet weight make a difference when doing the zero.
How to Start Writing My Pistol Optic’s “Story”:
This isn’t as complex or time-consuming as it might sound. Here’s how I approach it.
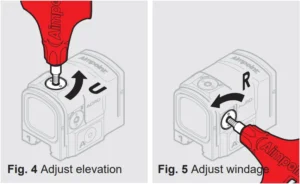
First, I begin with my starting chapter at 15 yards or 45 feet, and get my red dot centered on my point of impact. Before adjusting the optic, I ensure my shooting platform is consistent, focusing on good body mechanics that allow the dot to naturally align with the target. I also adjust my dot’s intensity to provide clear contrast against the target, making sure not to dim it too much and not so bright that it “blows out” the point of aim! Then, I gather my data by shooting groups of 5-7 rounds, not worrying about perfect groups yet, just noting the general impact area. If I’m working with someone else, I’ll even take the chance of anticipation out of the equation and have someone else press the trigger for me (Mudgett Drill).
Next, I add more pages to my story, moving my target back incrementally to 25, 50, 75, and 100 yards. At each distance, I shoot more rounds (7-10+ at longer distances) to gather more data points and account for any rounds that I consciously know were shooter errors. I focus on elevation; I’ll likely notice my group starting to drop at longer distances, which is normal. The goal isn’t necessarily to always be dead center at every distance with the initial zero, but to understand how much it drops. I analyze, don’t emotionalize. I look at my targets objectively. If I know I pulled a shot, I don’t include it in my main data. I focus on the consistent group. I use the center of that group as my main data point.
For the plot twist, after I have data from all distances, I decide if I want to adjust my initial zero to maximize my MPBR. For example, if my 100-yard impacts are consistently low, I might make a small upward adjustment to my optic at 15 yards to bring my entire trajectory up, flattening out my “story” across more distances.
When I consider optic click values, I know most pistol optics have click values expressed at 100 yards. For example:
- Trijicon RMR/SRO: Typically, 1 MOA per click, which is approximately 1 inch at 100 yards.
- At 15 yards, 1 MOA equals (15/100)×1 inch=0.15 inches.
- Therefore, to move your point of impact by 1 inch at 15 yards, you would need 1 inch/0.15 inches/click=approximately 6.67 (or 7) clicks.
- Aimpoint Acro/CompM5: Typically, 0.7 MOA per click, which is approximately 0.7 inches at 100 yards.
- At 15 yards, 0.7 MOA equals (15/100)×0.7 inches=0.105 inches.
Acro Adjustment Tool, have your kit with you!
- Therefore, to move your point of impact by 1 inch at 15 yards, you would need 1 inch/0.105 inches/click=approximately 9.52 (or 9-10) clicks.
- At 15 yards, 0.7 MOA equals (15/100)×0.7 inches=0.105 inches.
- Holosun: Often 1 MOA per click (approx. 1 inch at 100 yards).
- At 15 yards, 1 MOA equals 0.15 inches.
Have the right tools for the job. You’ll need this or a very small screwdriver to adjust the Holosun optics
- Therefore, to move your point of impact by 1 inch at 15 yards, you would need approximately 6.67 (or 7) clicks.
- At 15 yards, 1 MOA equals 0.15 inches.
- Leupold DeltaPoint Pro: Often 1 MOA per click (approx. 1 inch at 100 yards).
- At 15 yards, 1 MOA equals 0.15 inches.
- Therefore, to move your point of impact by 1 inch at 15 yards, you would need approximately 6.67 (or 7) clicks.
- Sig Sauer ROMEO Series: Often 1 MOA per click (approx. 1 inch at 100 yards).
- At 15 yards, 1 MOA equals 0.15 inches.
- Therefore, to move your point of impact by 1 inch at 15 yards, you would need approximately 6.67 (or 7) clicks.
To generalize, to translate a 100-yard click value to 15 yards, you multiply the 100-yard value by (15/100) or 0.15. This tells me that small adjustments at 15 yards make a very tiny difference in inches moved, highlighting why going to longer distances for confirmation is crucial.
Finally, I confirm my narrative. After making an adjustment, I go back to 15 yards to see how it affected my point of impact there. Then, I jump back to my furthest distance (e.g., 100 yards) to see if the adjustment yielded the desired effect across the board. This repetitive process helps fine-tune my zero.
The Epilogue For This Story
While the traditional 45-foot zero is a good baseline, truly optimizing my pistol-mounted optic for self-defense and law enforcement means going beyond a single number. It’s about understanding the “story” my bullet tells at various distances, informed by meticulous data collection and a commitment to professional-level firearm proficiency. So, the next time you’re at the range, don’t just “zero” your gun – write its full, confident story and know your DOPE!