Making The Switch To a Pistol Red Dot (instantly & effortlessly)
Red dot sights on pistols, also called micro red dots or micro red dot sights (MDRS), are all the rage right now for defensive use after proving their effectiveness in the shooting sports for the last several years.
They are almost as big of a game-changer on pistols as they were on long guns.
On most targets, you can keep your focus on your target, put the red dot where you want your bullet to go, and the bullet will go there (instead of lining up the front and rear sight and having to shift your focus to the front sight).
They negate many of the aiming advantages of a longer slide, make shooting easier for shooters with visual confusion (seeing ghost images when aiming with both eyes open) and they can be easier to track in recoil than iron sights.
When you just look at accuracy (and not speed), red dots make a huge difference. As long as you can press the trigger without disturbing the muzzle, it’s just ridiculously simple to shoot tight groups with a red dot and to shoot accurately at much longer distances.
But, when you add speed to the equation, the game changes… Red dots reward precise irons technique and add a severe time penalty for deviations from precise technique.
Red dots tend to help solid shooters shoot 10%-20% better (speed/accuracy) but actually cause most novice to intermediate shooters to shoot slower. (I’m going to tell you how to fix that)
I have used red dots on pistols for 5-6 years, but until recently it was primarily for plinking with fun guns with my boys and with brand new shooters who are touching a gun for the first time.
The first time that someone is shooting a gun, my priorities are that they are safe and have fun.
The sensory experience is so overwhelming that they’re not really going to create or retain any skills…I just want them to create a positive association with shooting and we’ll build skills later. I’ll get into why this is important in a minute.
Until recently, a red dot just didn’t have a place for me on a serious gun because of a few unique…almost primadonna…requirements that I had.
- Red dots on pistols are notorious for having a steep learning curve. I wanted zero learning curve and to be able to take advantage of the highly refined draw stroke and presentation that I already had.
- I didn’t want to lose any of my ability to do sighted shooting. In fact, this is a bigger deal than many people realize and significant practice should be done with iron sights even if/after you switch to a red dot.
- I wanted to be able to blindly draw any Glock, use the exact same presentation, and have the sights or dot come up into automatic alignment between my dominant eye and the target without any lag.
This can be a big deal if you have multiple pistols in the same family but don’t want to (or can’t afford) to get red dots for all of them at once. Switching to a red dot may mean that some of your holsters no longer work. Also, if you happen to carry muzzle down in a shoulder holster as a deep concealment method (as I do), the bump of a red dot is very visible from behind.
- I wanted a red dot on my carry gun but couldn’t justify getting one on my SIRTs, airsoft trainers, paintball trainers, and CO2 trainers…so I needed a setup that would allow me to do the majority of my practice with irons and get 100% of the benefit when I shot my pistol with the red dot.
So, basically, I wanted all of the advantages of a red dot with zero learning curve and none of the drawbacks that are typical of switching from irons to a red dot.
When I see a skill where most people are failing/struggling and a few have no issues, my default is to reverse engineer the process, identify the critical factors, test hypotheses, and then roll stuff out that makes things easy/easier for “most.”
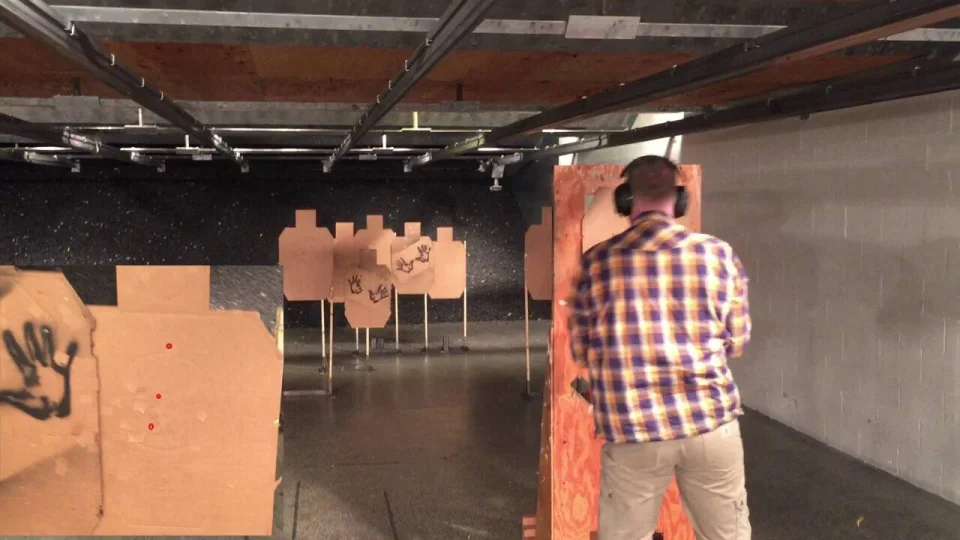
In this case, I identified the factors, stacked the odds in my favor, and went from not shooting a red dot to putting one on my carry gun on a Saturday, making sure I could hit steel with it for a few rounds, purposely NOT doing rapid fire or dry fire reps, and shooting a match the next day.
I was able to draw and engage quickly and shoot -0 body & head shots with .2-.25 splits on the move and around cover with my Glock 26.
0:52
Absolutely zero learning curve…but that’s because of what I did ahead of the switch and how I set up my optic.
For some people, this is going to be old news…for most, it will be very helpful and save a TON of wasted time and frustration.
The 2 key factors are:
- Co-witnessing
- Up+out presentation
Let’s start with co-witnessing.
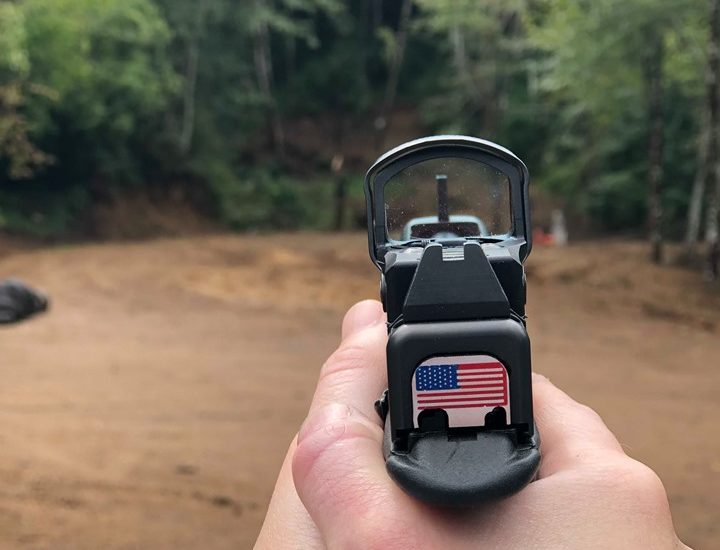
Co-witnessing is simply having both your iron sights and your red dot visible and usable at the same time without needing to move your dominant eye or the gun.
With red dot sights on a pistol you’d carry, you can mount the red dot to the slide using the rear dovetail, or have a notch cut out of the slide that the red dot base goes into. These notches can be shallow or deep, depending on your preference.
You can also mount the red dot to the frame for sport shooting, but that’s another conversation.
Here I’ve got a Glock 19 with a dovetail mount on top (not co-witnessed) and a Glock 26 with a Lone Wolf slide cut on the bottom (co-witnessed).
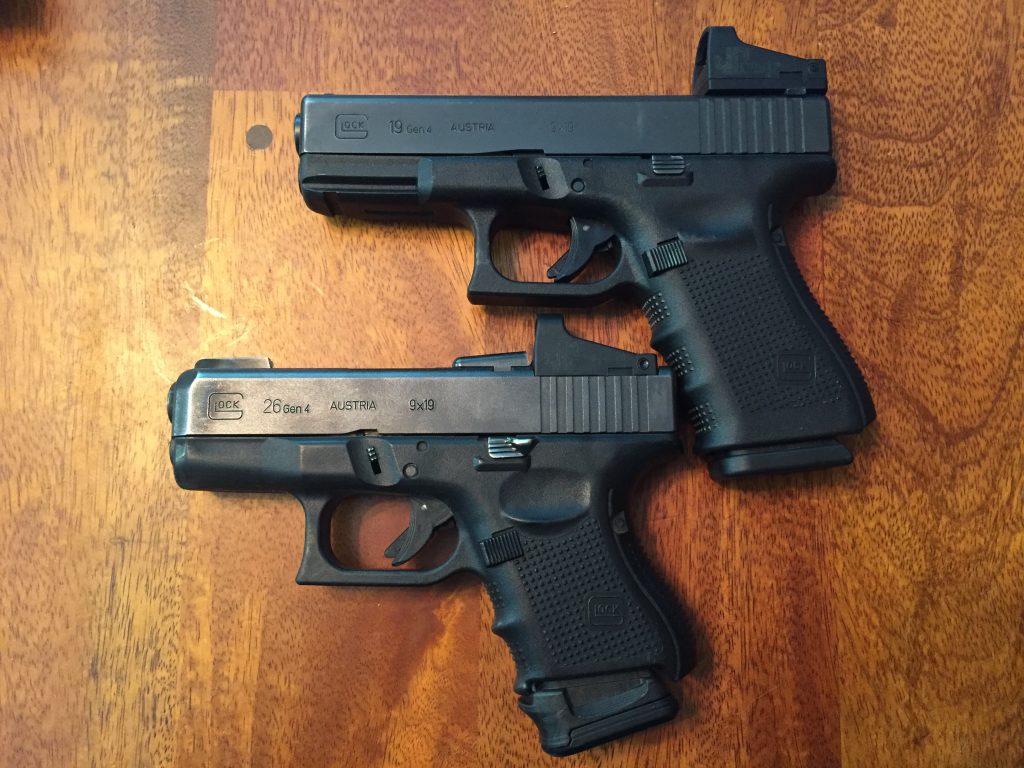
With the dovetail mount, the dot ends up much higher than factory height sights…enough that you won’t be able to see the dot at all with a presentation that brings your sights into alignment. That means 2 different presentation methods depending on whether you’re using a pistol with irons or a red dot.
Again, if you can keep your presentation exactly the same, regardless of whether you’re using a red dot or irons, you’re going to build skill quicker and easier AND you’re going to have a more seamless transition from irons to red dot.
With a cut (or melted) slide and a dot that sits low, you can see and use either your factory height sights or the red dot at the exact same time.
A lot of people put suppressor height sights on their pistols so they can use both their red dot and irons…I have done that on my Sig P220, but won’t do it on my Glock.
Why?
Again, it’s because I want consistency in my presentation, regardless of which of my Glocks I’m drawing or whether I’m drawing one of my non-gun trainers. That means that I either switch the sights on every single one or I keep them all at factory sight height.
The 2nd big factor has to do with the fact that a red dot rewards a presentation that automatically places the sights or dot between your dominant eye and the target and penalizes a non-perfect presentation.
With iron sights, when your sights are off, you can look at the front and rear sights and figure out which direction you need to move the gun to get them into alignment.
With a red dot, if you can’t see the red dot, you may have no idea which way you need to move the gun to make the red dot visible without switching to looking at the sights. Furthermore, you may not know whether your alignment is off or whether your red dot is turned off or not working.
Let’s look at a few types of presentations from the holster…
First, 2 bad ones…don’t do either of these:
- “Bowling” which is swooping the gun out & up from the holster, like a pendulum on a grandfather clock.
- “Fishing/Casting” which is bringing the muzzle way above horizontal and then back down to our target.
Next are the more common ones:
- Diagonal, straight from the holster to the final shooting position. This is faster when it works, and slower when it’s not perfect. It takes a lot more practice to be consistently accurate with this technique, but several pro shooters use it because it can buy them .05-.10 seconds on their first hit times after they’ve maxed out every other factor. If you’re not one of the top 100 shooters in the world, there are easier, better, and more resilient ways to shave off .05-.10 seconds from your draw.
- Diagonal, straight from high compressed ready to the final shooting position…often called, “pushing it out or punching it out.” This is more forgiving than going diagonal out from the holster, but can leave you clueless if the red dot isn’t visible.
- From high compressed ready, move the gun up+out at a 45(ish) degree angle until the sights are between your dominant eye and the target and then push out. Larry, Dusty, and Beau from Sealed Mindset termed this the “hockey stick” or upside-down hockey stick. You can also call it an “up+out.”
The hockey stick presentation gets the sights into your cone of vision (shown below) sooner and allows you to make fine adjustments as you’re pushing out to your final shooting position.
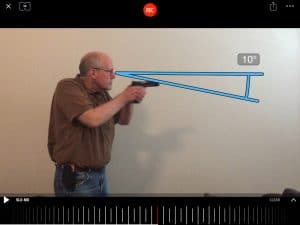
Most importantly, it’s MUCH more forgiving than going straight from the holster or punching out from high compressed ready…especially at off-angles.
What this means is that if you do your practice with iron sights in a way that AUTOMATICALLY puts your sights into alignment between your dominant eye and the target, and you use a co-witnessed red-dot, you’re going to have an effortless transition back and forth between irons and red dots.
How do you get a co-witnessed red dot with factory height sights?
It’s harder than you might think.
There are a ton of red dot systems available right now. The 2 gold standards are the Trijicon RMR 2 and the Leupold DeltaPoint…with Holosun picking up steam incredibly fast. It’s relatively easy to get these to co-witness with suppressor height sights, but incredibly difficult, if not impossible, to get them to co-witness with factory height sights.
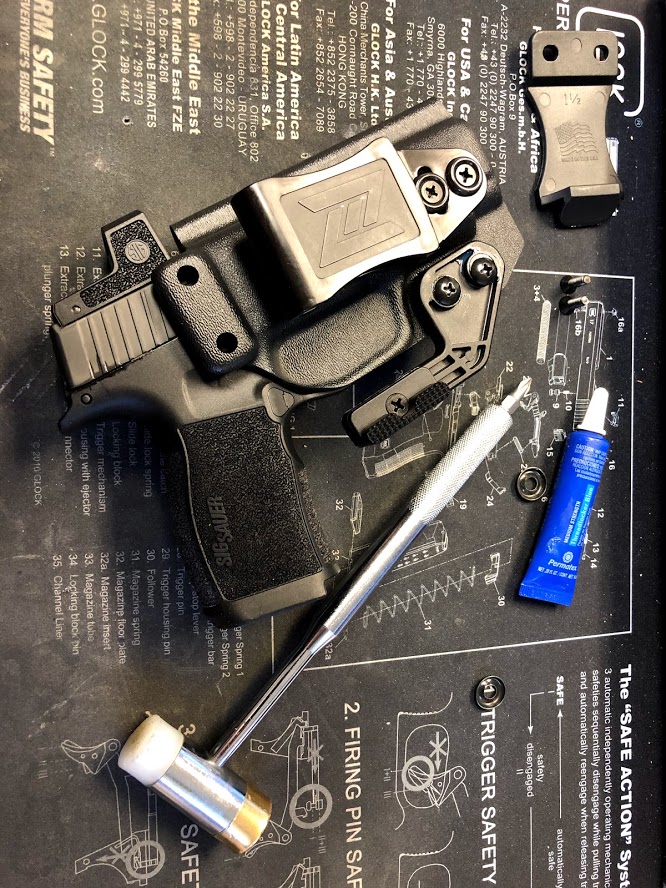
As a result, I went with the JP/Shield JPoint 4 on a slide that I had cut by Lone Wolf Distributors.
Why?
The JPoint 4 sits INCREDIBLY low and the Lone Wolf slide cut is pretty deep. The combination of the 2 let me have a red dot that co-witnesses with my factory height iron sights.
It doesn’t have all of the bells and whistles that other micro red dots have…there’s no switches (it’s always on and you replace the battery every 6 months) and it’s not as resilient to being dunked in water, but it’s ridiculously easy to use and tough when mounted to the slide.
Regardless of what pistol red dot and mounting option you decide on, the big question is, what’s the best way to get your draw stroke dialed in so you can make a seamless transition from irons to a red dot?
Using traditional training methods, systems, and tools, it’s a hit-or-miss proposition that takes a lot more time, effort, and money than it should.
Fortunately, we’ve got 3 training programs that will help you get the job done..to get you a quick, efficient, and resilient draw stroke in a fraction of the time that it would take with traditional training.
First off, we’ve got the Draw Stroke Mastery Sub-Second Draw Stroke training. This training will help you shortcut the process of making sub-second HITS from the holster (even concealed). Most people think this takes a lot of time and effort, but that’s not correct. When you train SMARTER rather than harder, you can get this kind of performance in only minutes per week.
Second, we’ve got Automatic Aiming. Automatic aiming will help you shoot a pistol better than you thought possible with both eyes open…even if you’re cross-eye dominant or have visual confusion when trying to aim with both eyes open! Check out the free presentation we’ve got >HERE< that will let you experience some of the benefits of the training…first hand, in real time. It’s unlike any other gun training OR online presentations you’ve ever seen.
Third, we’ve got our Praxis Dynamic Gunfight training that delivers real-world performance beyond any other gun training currently available. You’ll learn how to train so that you build more skill in a fraction of the time and effort than what’s possible with traditional training, so that you’ll be shooting better on the move than most shooters can shoot flat-footed. This training is vital, regardless of how quick and mobile you currently are because the fact is, real-world self defense situations involve movement whether you want them to or not. Check out the presentation >HERE< to see how and why this training is so vital for ANYONE who owns a firearm for self-defense.