A BEGINNER’S GUIDE TO BUILDING AN AR15 PART 5
We are almost finished with the assembly of the upper.
INSTALLATION OF IRON SIGHTS
Get your quality back-up iron sights that you bought and use the driver that fits to put them on your assembled upper. They usually slide on with a bolt removed. I like to install my sights as far to the rear and as far to the front as possible.
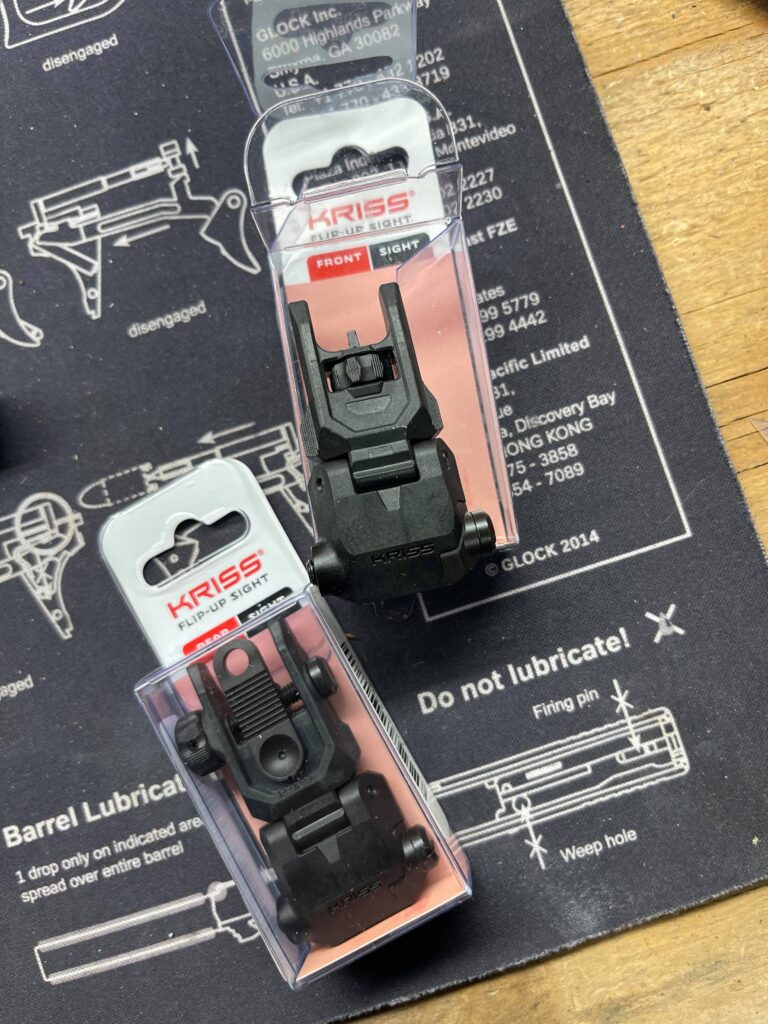
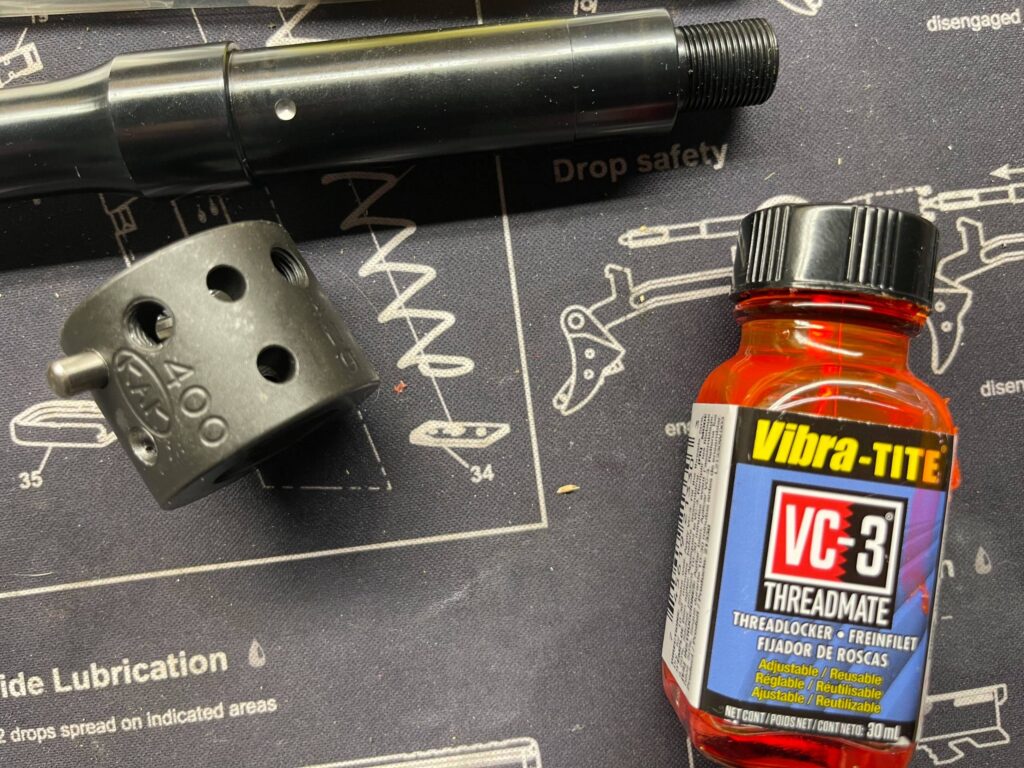
Appropriate strength thread lock should be applied to the tightening screws and use care to not over tighten. Follow the directions provided by the manufacturer on how tight and where to tighten. I do this assembly while the upper is still in place on my reaction rod.
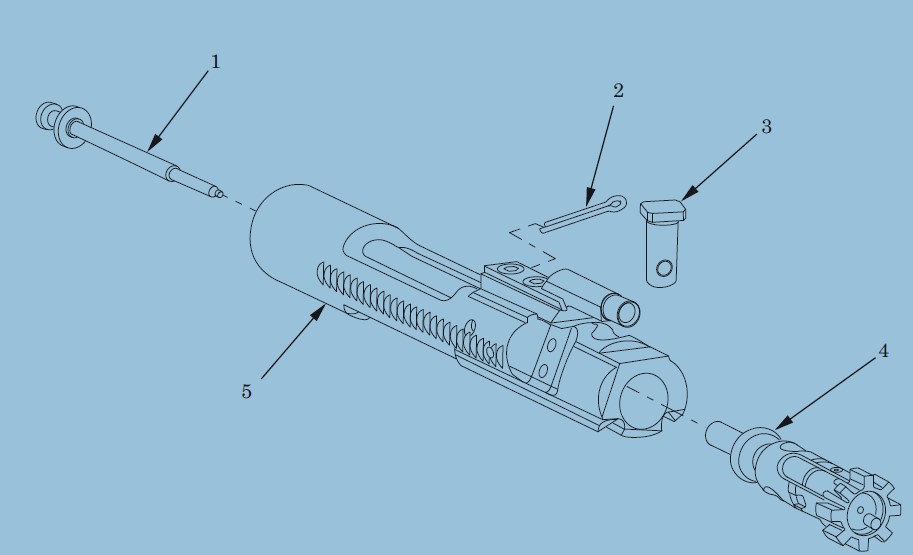
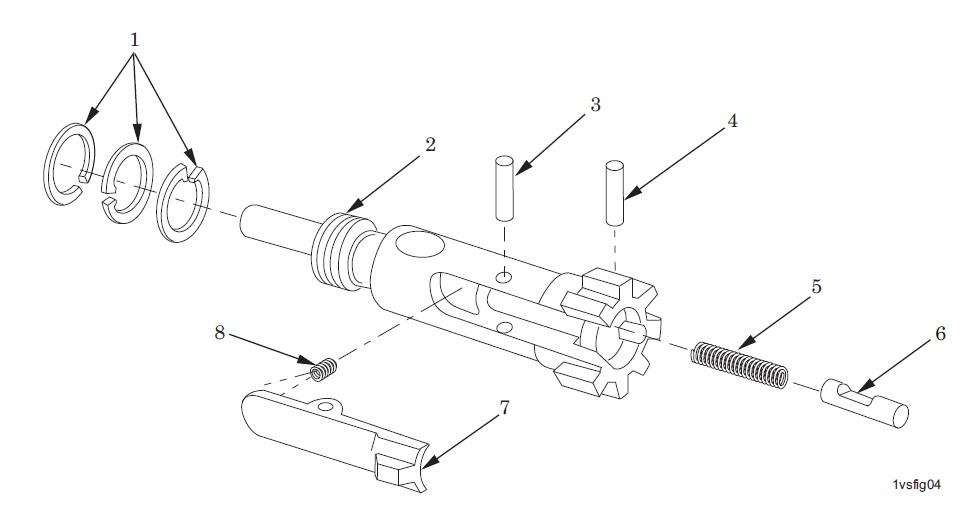
ASSEMBLY OF THE BOLT CARRIER GROUP (BCG)
You’re going to need 1 firing pin, a firing pin retaining pin, a bolt cam, a bolt, and the bolt carrier for the overall assembly.
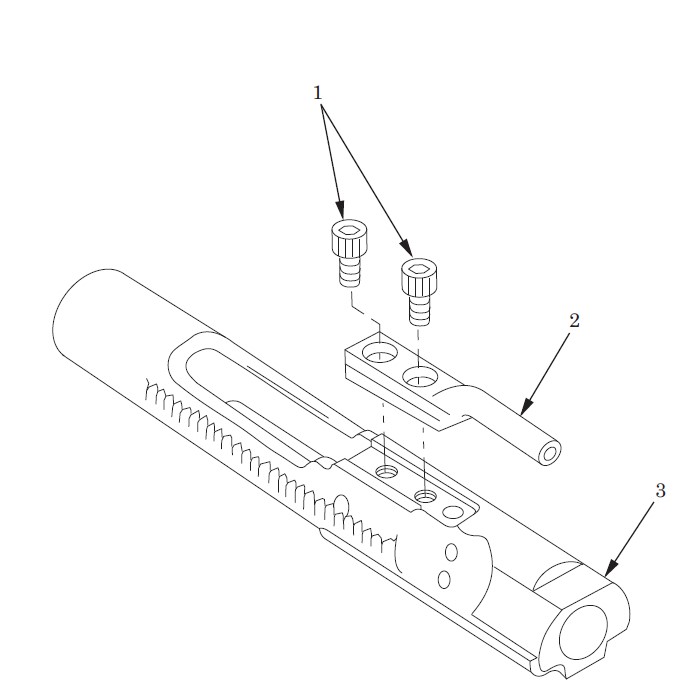
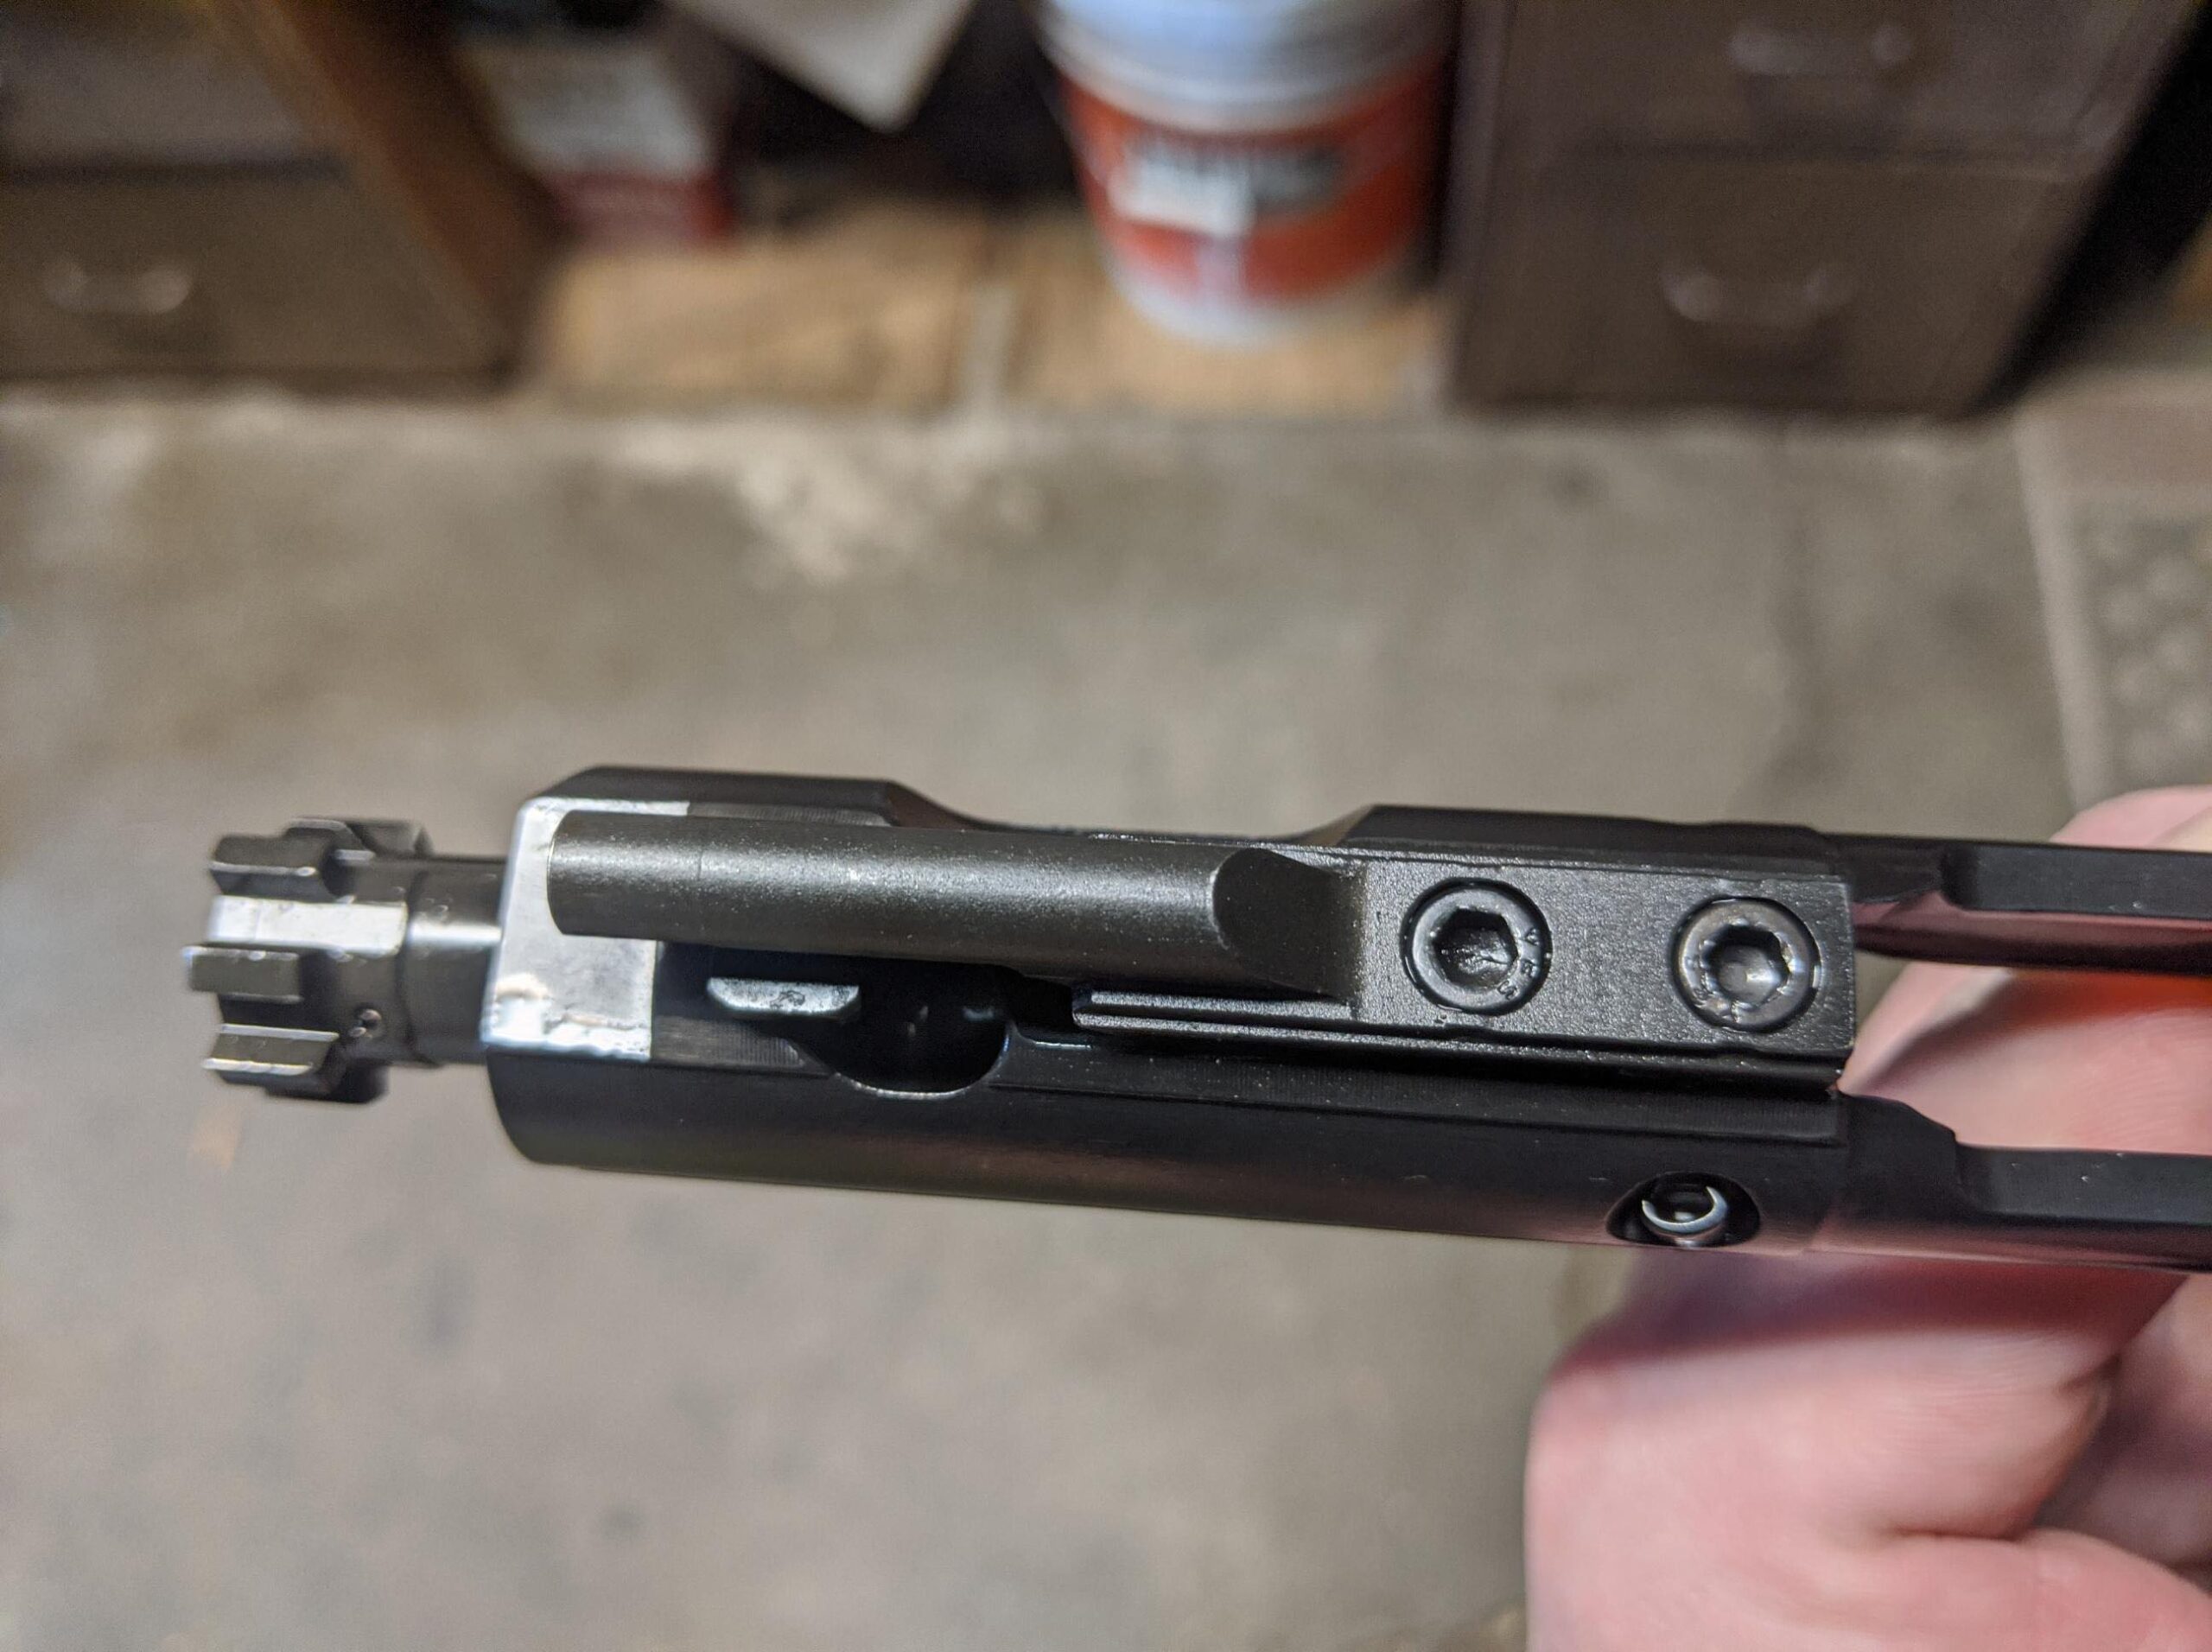
70 inch pounds for carrier key bolts. Hand stake the carrier key bolts or use a jig.

INSTALLATION OF THE CHARGING HANDLE AND YOUR ASSEMBLED BCG
Take your charging handle and slide it into the rear of your upper receiver. Align the notch on the charging handle with the notches inside of your upper so that it drops into the channel and slide it in about a quarter inch so that it freely slides back and forth. Take your assembled bolt carrier group with the gas key facing the muzzle. Put the key into the channel of the charging handle and push it forward until it latches in place.
If you have purchased an optic, now is the time to install it on your upper. How far away from your eye that you install it is up to you and up to what optic you bought as far as eye relief. I like mine about centered over the dust cover.
Again, use thread lock or it will come off when you least expect it during use! Tighten it to manufacturers specifications, preferably with a torque driver like the Smart Torq from Real Avid.
If you are just finding this series, check out Part 1, part 2, part 3, and part 4.