Lessons from Teaching the Red Dot on Handguns
What really is a reflex sight? What are the differences between a red dot, holographic, and reflex sight? We tend to use these terms interchangeably, however there are specific differences and one may not truly be the other. It is safe to say, reflex LED (light emitting diode) based sights can be called red dot sights. Depending on who you talk to (EOTech) holographic sights are not necessarily red dot sights. The real differences are in the technology and how the reticle is optically projected.
The historic originator of military/law enforcement (LE) red dot optics was Aimpoint. Trijicon started with tritium illuminated sights in 1981. EOTech cornered the market in holographic sights. According to Aimpoint’s website, “In 1974, Aimpoint® pioneered the first electric red dot reflex sight for use by hunters and sport shooters.” Trijicon released the 1×24 Reflex Sight in 1996. That same year, EOTech introduced the first holographic weapon sight (HWS) then introduced LE/military HWS models in 2001. I’ve been a law enforcement firearms instructor for about a decade and have used EOTech holographic sights and Aimpoint and Sig Sauer red dot sights on duty weapons. Additionally, I have used and tested Trijicon, Holosun and Vortex red dots on a variety of weapon platforms. I have commonly referred to all of these optics as red dots though EOTech would take issue. EOTech does make a red dot pistol sight called the EFLX Mini Reflex Sight.
Generically, we will refer to a handgun mounted optic with a red dot as the sighting image a “red dot” or “MRDS (miniaturized red dot sight)”.
Transitioning from iron sights to a red dot optic I was told things I began to question so I took a deeper dive looking for the correct answers. I listened to lectures on eye alignment and interviewed several optometrists and optical engineers.
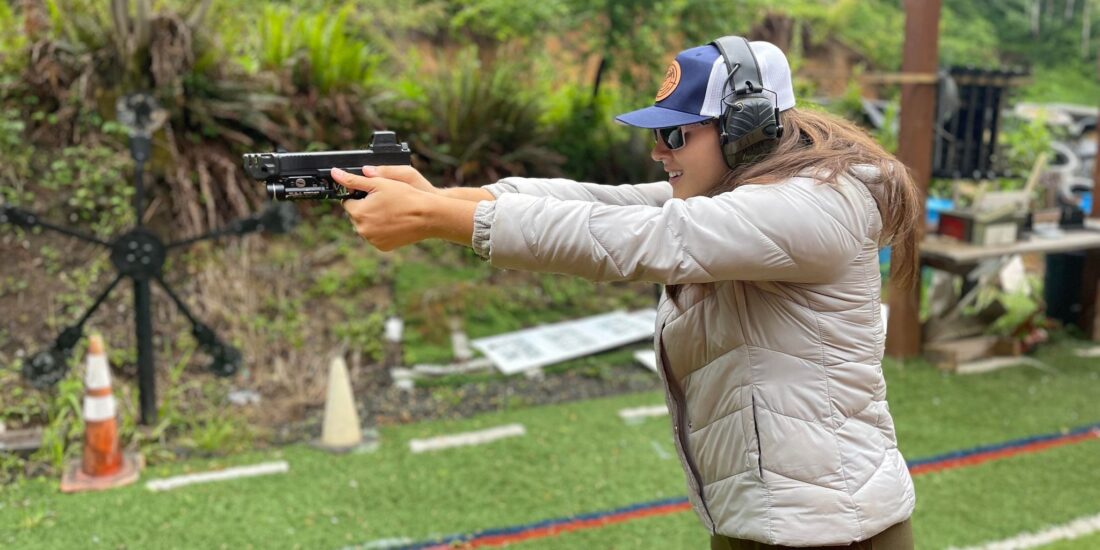
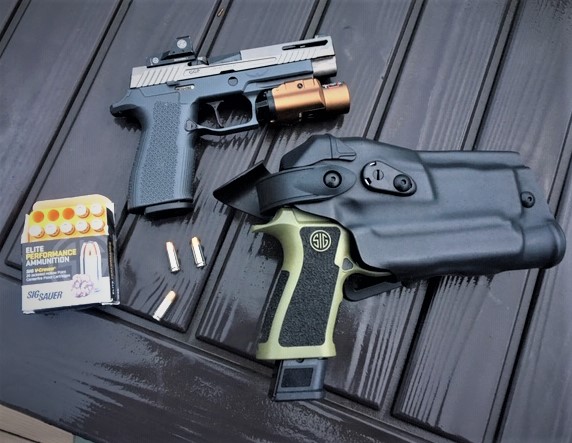
I was fortunate to be included in a core cadre of instructors introducing a new firearms program to incoming academy students using a red dot reflex sight on duty handguns. We were using Sig Sauer P320s with Sig Sauer ROMEO1PRO red dot reflex sights and suppressor height iron sights. The following lessons were from my experience teaching hundreds of law enforcement professionals with a range of skill levels.
Take what I tell you with grains of salt. These are my observations throughout the last year teaching firearms with red dot reflex sights. Research is ongoing. These are things which I found valuable and have worked. After a few years, I’m sure we’ll find better and more efficient ways and methods.
Lesson #1: Know how to install the optic
This seems to be basic, but greatly overlooked. In the academy, we wanted to maximize training time and minimize technical malfunctions. We had our armorer install the optic to specifications, bore sight and co-witness it (we’ll discuss co-witnessing later). He thus had to install the battery. The instructors would double check the torque of the battery cover (10-12 inch/pounds) then witness mark the mounting screws and the battery cover. Sig Sauer recommends checking the torque of the mounting screws and the battery cover every 500 rounds. We would then confirm zero of the iron sights, then zero the red dot. If any adjustments needed to be made or there were any malfunctions where the optic would need to be removed, you needed to know the torque for the mounting screws (28-30 inch/pounds).
Ideally, the user should know that there are witness marks on his optic and why they are there. We recommend our students replace the battery before each qualification (quarterly) as the Sig Sauer ROMEO1PRO battery life is 20,000 hours with MOTAC enabled (which is approximately 2.3 years). We do realize most of our students will not take the time to check the witness marks every 500 rounds, but it is a helpful indicator for issues with the red dot. In LE/military, when there is an issue with the optic, most students will go to the instructor or armorer for help instead of troubleshooting themselves.
A small amount of Lock-tite should be added to the mounting screws – not to the battery cover. There were incidents when too much Lock-tite was used and caused the gun to seize-up so use sparingly. Place a drop on the threads and wipe off the excess off of the lands where you can see the Lock-tite resting in the grooves.
The user and instructor should know these specifications to efficiently diagnose problems in zeroing, optic malfunctions, and shooter error.
Lesson #2: Know how to adjust the optic
Believe it or not, about half of the students could not correctly turn off the red dot as instructed. We spent time having them turn the optic on and off in the classroom and they knew they were supposed to turn off the optic before they turned in their guns at the end of each class. The most common issue was they would tap the lower brightness button until the dot disappeared instead of holding either button for 1-2 seconds. When you turn on the optic, the ROMEO1PRO will return to the last brightness setting used.
Several times, the students stated their optic’s battery was dead. Good thing we witness marked the battery cover. It didn’t seem like the battery cover was loose. Could the battery have died in less than 2 weeks? When they last thought they turned off their optic, they had actually had it in Night Vision mode.
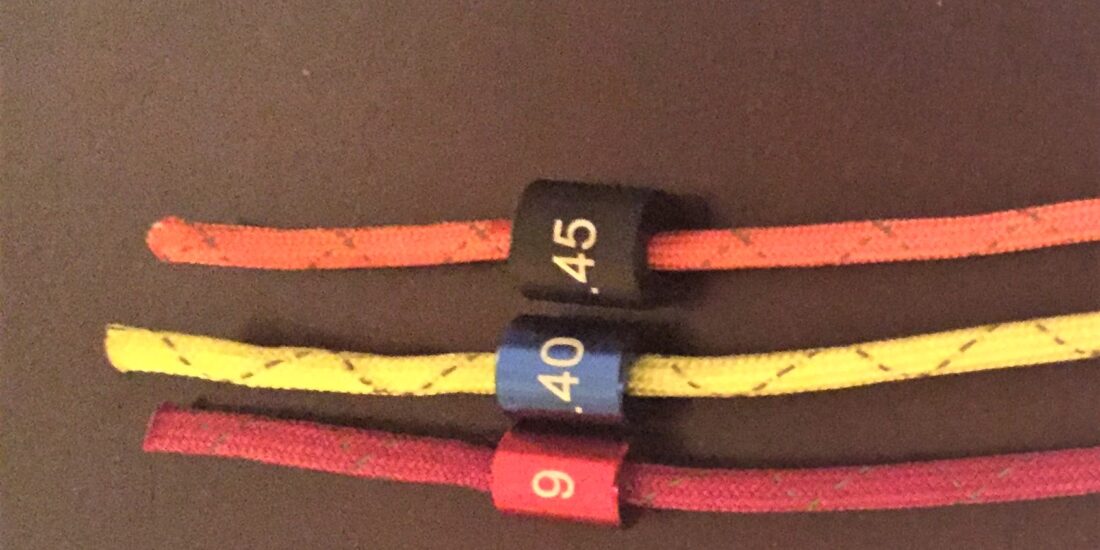
The ROMEO1PRO’s tactile and audible feedback for the elevation and windage adjustment dials are not as easily noticeable as other optics. The easiest method for adjustment is to understand 1 revolution is equal to 30 clicks, with each click being 1 MOA (minute of angle). 1 MOA is approximately 1” at 100 yards. We regularly used a zero target that included printed simple adjustment instructions of the various red dots used by our agency.
The ROMEO1PRO is equipped with MOTAC (Motion Activated Illumination System) which allows the optic to power down when it is stationary, and power up when it senses movement. This is a power saving feature.
One factor in shooting speed is the ability to quickly see the red dot over the intended target. When the dot is brighter, it appears bigger. When looking for a refined shot like hitting a bullseye or zeroing the gun, most shooters want a small dot (aim small, hit small). The downside is when you have a perceived small dot, it vibrates and dances then you begin to chase it which can increase your risk of snapping the trigger press. I told shooters that when the dot is perceived to be bigger, it doesn’t appear to vibrate and dance as much and appears to float. We would say, “Float the dot, take the shot.” Also, many people shoot a tighter group with a bigger dot as our brain automatically wants to place things in the center of a circle
Ideally, and thinking tactically, you want to have a dot at a brightness level that will work in low light and in bright light (indoors and outdoors). We suggested turning the brightness to the maximum level, then dropping down 1-2 settings. This level of the dot’s brightness seemed to work for most people in most light settings.
Whatever red dot optic your agency chooses, make sure you understand how it functions and the features it has. Learn to properly turn it off and set it for optimal battery use. Know how to adjust the brightness. Understand how to make windage and elevation adjustments.
Lesson #3: CNEWS concept
Wherever the dot is in the optical window, that is where the point of aim is. Or, wherever you see the dot, that is where the bullet will go. Our brain naturally wants to center things. When we see through the optical window, our brain wants to place the dot in the center of that window. Some shooters believe the dot needs to be in the center of the window to obtain proper sight alignment.
It doesn’t matter where the dot is, if you can see it, that is where the muzzle is pointed and if your trigger press is good, that is where the bullet will go.
The CNEWS drill is a way to prove this concept to the shooter. CNEWS, an acronym for Center, North, East, West, South, is a slow fire/untimed drill. From 7-10 yards, shooting at a target which has some sort of center mass area you will aim at, shoot 2 rounds with the dot centered in the optical glass. Move the dot to the furthest area in the north of the optical glass (think 12 o’clock), still placing the dot center mass, take 2 shots. Next, move the dot to the furthest area in the east of the glass (think 3 o’clock), place the dot center mass, take 2 shots. Continue with 2 shots west and 2 shots south. West would be 9 o’clock and south 6 o’clock. You get the point. 10 rounds total and what should you see. If you can normally shoot a group from 7-10 yards, all the rounds should be center mass (or at least in the same general area). It really helped to visually show the students what the sight picture would look like and there are overlay reticle training aids which make explaining this easy. (see Trainingsights.com)
Here is an extreme example of trusting the dot no matter its perceived position relative to the optical glass. I am right handed and right eye dominant. When I first tried to shoot the M-4 using an Aimpoint red dot from my left shoulder attempting to use my left eye to acquire the dot, the dot appeared to be out of the optical tube. It was floating in space to the upper left area outside of the optical tube. It was difficult to trust, or even think, the bullet would actually hit the target which the dot was superimposed over without the target visually being within the area of the optical tube. I pressed the trigger and the shot went where the dot was. Amazing. With regular practice, my eyes and brain learned to process the information normally and the dot eventually moved back within the optical tube. I can now use both my left eye and right eye with red dots, and they appear within the confines of the optical housing. Yes, you can train your eyes and brain to learn to process information in different ways.
When you trust where the dot is, that is where your shot will be, you can improve your speed because you’re not taking time to perfectly center the dot like you are with iron sights. This drill is one of the most valuable for learning the red dot as it involves trust which leads to speed and efficiency.
Lesson #4: Value of Dry Fire
Do not discount the value of dry firing. Whenever an agent was having difficulty during qualifications or training, the first question I asked was usually, “Did you do any dry fire recently?” The most common reason your rounds are not going where you want them to go is that you are flinching/anticipating/moving the muzzle of the gun unintentionally while you are pressing the trigger. We narrow it down by saying it is an issue with your trigger control. How do you change a habit of anticipating the recoil? You have to build up and strengthen the neural pathways which reinforce a good trigger press – of keeping the muzzle stable through the trigger press. This is most easily practiced by dry fire. The great thing is that dry fire is free, takes no ammunition, and you don’t have to go to a range to do it.
This is where dry firing with a red dot shines. Using a target with a small bullseye, you can see what motion you are causing by observing how the red dot moves through the trigger press cycle. A way to drill this is to print out 1” – 2” black circle(s) on a sheet of paper and place it on the wall. From various distances conduct a series of dry fire trigger presses making sure the red dot stays within the black circle through the trigger press and until right after the trigger “breaks”. The down side with this drill is the tendency to focus on the red dot instead of the target. You need to stay target focused while recognizing where the dot moves through the trigger press.
There are now small, relatively inexpensive electronic tools which give immediate feedback to the shooter. Devices like the MantisX are lightweight and can be attached to your handgun, connect via Bluetooth to an app on your phone. The software collects and analyzes dry fire and live fire data. The app has numerous functions including daily challenges, various drills and can be set to give audible feedback based on the quality of the trigger press. Audible feedback creates positive instant recognition similar to shooting steel and reinforces better habits. The MantisX records each trigger press, tracks and maps the muzzle path through placement of finger on the trigger, time pressing the trigger, breaking the shot and movement after the trigger “breaks”. The MantisX app also has drills for component firearms handling skills such as timed response, one handed shooting, reloads and magazine exchanges.
Use of the MantisX is not just important for the shooters, but an instructor can create a group profile where all members of the group can see others’ progress and dry fire activity. This function is useful for monitoring students’ actual dry fire progress and identifying trends in shooter error. Group profiles also may encourage competition and short and medium term goal setting.
Lesson #5: 5 point grip check
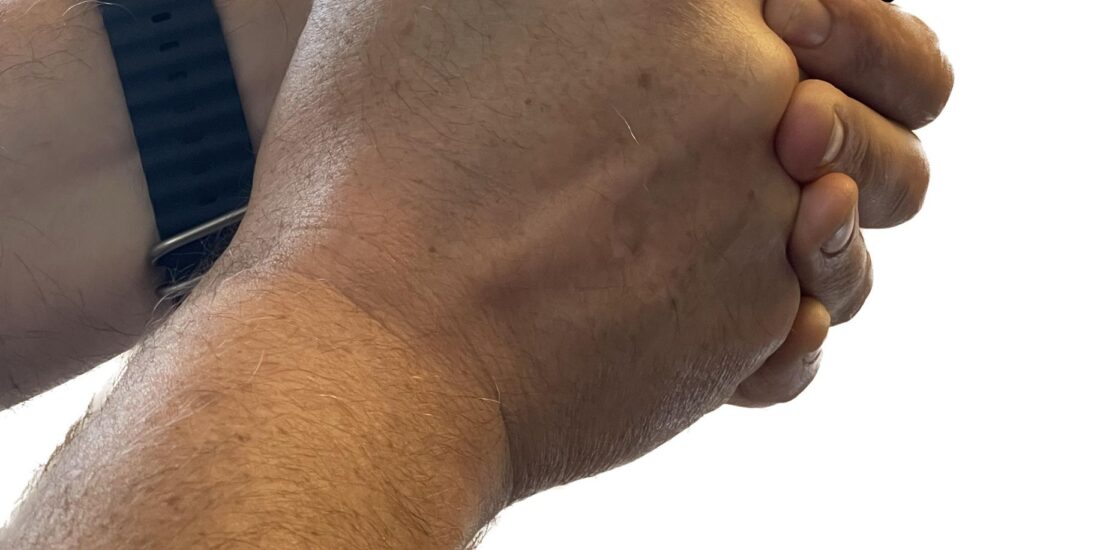
All shooters should understand the fundamentals of shooting, but consider the practical goals of a specific shooter. What if we have to narrow it down to what is most important to handgun combat shooters. The practical goal is getting the muzzle in the direction where the shooter intends for it to be pointed when the trigger is pressed and to quickly be prepared to fire successive shots. Effective combat accuracy. If we needed to focus on only 3 fundamentals, those would be: grip, sights, and trigger control. Grip is where the gross muscle group movement of flinching and anticipation manifest. Grip is what controls the recoil and follow-through which affects shooting speed. Skeletal-muscular structure and physics drive this fundamental. We used a 5 point check to verify the effectiveness of the students’ grip This is to be done dry; no ammo, no magazine. The student should get into their shooting stance and present the gun to extension. If any of these 5 checks were failures, correct them, give a brief explanation of the why, and start again from the beginning.
1. Check for maximum contact of their palms and fingers with the grip and frame of the gun and ensure the web of their strong hand is high in the tang. If done correctly, the heels of their palms should be firmly pressed together.
2. Tap the front of the trigger guard to simulate recoil, then randomly not tap the trigger guard and check if they pushed into the gun anticipating the last tap. They will likely have to adjust their stance to brace for the simulated recoil and not anticipate.
3. Check that their support thumb is alongside the frame and is not touching the slide. Check that their trigger finger is straight along the frame. The support thumb and the trigger finger should be parallel to each other on opposite sides of the gun.
4. Check their wrists are firm by grabbing the forward part of the slide and frame and rotating it upward simulating muzzle flip.
5. Check that they are applying vice-like pressure to the sides of the grip by slapping the inner parts of their forearms simultaneously ensuring their grip does not come apart.
The shooters should not be afraid to adjust their grip or stance if it will make them more efficient and effective. There are successful competition shooters who say they are always making adjustments and refining their grip. Many would say they have yet to perfect their grip.
Lesson #6: Target Focus
Humans are hunters. We have binocular vision which is naturally oriented to a target. The red dot is designed for the shooter to focus on the target with both eyes open. Although this is advantageous as it should be natural, this does pose some problems. First, shooters who were brought up on iron sights are trained to focus on their front sight. Second, when you have a nice illuminated red object in front of you, it takes some effort to not fixate on it. You can get away with being dot focused, but if you are shooting at distance, it will be an issue.
The focal plane of the red dot should be the focal plane of the target. For new shooters using a red dot, it is instinctive to be target focused – there is one focal plane, wherever the target is. For previous iron sight shooters, they were used to dealing with 2-3 focal planes – rear sight, front sight, target, and most of the time was spent on the front sight.
It’s not unusual to have headaches at the end of a session.
To train your eyes and brain into target focus with both eyes open, you may need to conduct dry fire sessions which focus on distances greater than 15-20 yards. You can also target something you need to read or see in more detail if dry firing at less than 7 yards.
Float the dot and take the shot, don’t stare at the dot.
Lesson #7: Eye Issues
No one is symmetrical, that is, your left side is not an exact mirror image of your right side. Approximately 80% of people have some misalignment of their eyes. Of those with a misalignment, 80% of those have one eye looking slightly outboard (called exo-phoric). There are various degrees of this misalignment. When using a red dot optic, one of the reasons to learn to target focus is because of this common eye misalignment.
If you have had an eye exam and the eye doctor covers one of your eyes then the other, one of the things he is checking is if you have a phoric or tropic condition. When you focus on a point in the distance with both eyes and you have a minor misalignment, when one eye is occluded (covered) the other eye will shift or correct. Generally, an eye misalignment which corrects like this is called phoria and one which does not correct is called tropia. There are more occurrences of phoria than tropia.
You will find that most shooters new to the red dot will discover they have an eye misalignment when they shoot with their optic occluded. An occluded optic is when there is an obstruction in the front of the optic which prevents you from seeing the target through the optic, but you are able to see the red dot with one eye, the target with the other eye, and your brain combines the images . We will address proper handling of this issue later.
If you were trained on iron sights and have built the habit of focusing on your front sight, it takes time to learn to target focus and not focus at the glowing red dot which is supposed to be your aiming reference. Remember from Lesson #6, when shooting with a red dot, you are to be target focused.
I’ve had students who, by looking at their eyes, I could see they had phoria and in one session they were able to correct their point of impact shift by forcing themselves to focus on the target. I’ve had students who took several weeks to correct their focusing.
Lesson #8: Confirm MRDS zero regularly during the transitioning process
First confirm the iron sights are zeroed, then zero the red dot. You can do this initially by co-witnessing the red dot to the iron sights.
Consider 10 yards a minimum distance to confirm zero on a handgun. We would zero at 12.5 yards because the standard furthest distance for qualifications is 25 yards. This makes it easier to confirm and calculate adjustments. For example, if the shots group 1” to the right at 12.5 yards, if you double the shooting distance to 25 yards, the shooter should group 2” to the right. Since adjustments are in minutes of angle (MOA), it is easier when 100 yards is equally divided. Take our shot group that is 1” to the right at 12.5 yards: At 100 yards the group would be 8” to the right thus the correction would be 8 minutes of angle to the left.
Before making corrections, confirm it is a sights issue, not a shooter issue. The shooter needs to be able to shoot a group. A group being 3-5 rounds (slow-fire) within approximately 3” at 12.5 yards. If the shooter cannot shoot a group, do not adjust the sights: work on marksmanship. You can also prove out the need to adjust the sights by having the shooter double their distance and shoot a group. At 25 yards, you can expect the group to double in size and distance from their point of aim.
It was common to make minor adjustments to a shooter’s zero as they learned to use their red dot. As the eyes and brain learn and adapt, changes occur in processing information. I saw this in students and have experienced it myself. (Refer to Lesson #3: CNEWS Concept) While trying to learn to shoot the M-4 on my support side using my non-dominant eye, initially I could not see the red dot. As I practiced it, my eyes and brain were able to learn how to process the information.) I saw many students have their red dot zeros initially adjusted to where they were grouping, however the co-witness to their iron sights was way off. After several weeks of checking and adjusting their red dot zeros, their red dot began to move closer to its true co-witness with the iron sights. This is why I believe the red dot zero needs to be confirmed regularly throughout the transitioning process.
Lesson #9: MRDS Malfunctions
I had reservations about teaching the red dot as a primary sighting tool. Like all electronic devices they can malfunction, fail, break, etc. I also did not want shooters relying on their red dot and ignoring learning to use iron sights. Since the MRDS can malfunction, the shooters need to know what to do and how to address shooting if it does. The 4 malfunctions to address are: no dot visible, optic occluded, optic obstructed, optic with moisture.
When there is no dot visible the shooter should immediately transition to iron sights. If the shooter does not present the gun to extension consistently, they naturally begin hunting for the red dot. If it is a problem of an improper presentation and they line up their iron sights, the dot will appear if it is on. The challenge is minimizing the time lost when searching for the dot. A good way to conduct this drill is shooter/coach and have the coach randomly turn on or off the MRDS and put the shooter on a timer or, if using turning targets, give them short random facings.
There could be times when something splashes the front of the optic (objective side) which prevents you seeing clearly through the optical window, but you can still see the red dot. This is referred to as an occlusion. You could use a technique called the “Bindon Aiming Concept”. This concept was developed during the “birth” of using an illuminated dot as a sighting device on an optical tube. However, the tube could not be seen through and required the shooter to aim with both eyes open. One eye would see the dot and the other eye would see the target. Using binocular vision (seeing with both eyes), your brain would superimpose or overlay the image from one eye with the other eye creating one image.
To train this, place some non-marking opaque tape (blue painter’s tape) on the front of the optic. To see the effects of shooting with an occluded optic, I suggest shooting at a bullseye type target at more than 12 yards. More often than not, this is where you will see a point of impact shift. Remember Lesson #7: Eye Issues. If 80% of people have a minor misalignment of their eyes, of those people, one eye may perform some form of compensation when the vision of the other eye is occluded. Most shooters can correct this point of impact shift if they make sure they are focusing on the target. Some shooters need more time to develop proper focal shifting. Some shooters need more intensive eye therapy or correction.
When your optic is obstructed, no dot is visible and something is blocking the back of the optic (ocular side- closest to your eye) preventing seeing through the optic. If some mud or dirt got into your holster and landed on the ocular lens, this would definitely be something you would need to know how to fight through. Put the tape on the ocular side of the optic and use reference points on the gun to aim with. You can use the optical housing, the backplate of the gun, or the slide serrations of the gun as references to help point the muzzle to the target. Some choose to paint a line on top of the optic or a dot on the back of the shroud as references.
Try various distances (5-20 yards) with all the techniques to see the limits of acceptable accuracy and mark the shot patterns to see which methods work best for the shooter. You will definitely determine which techniques are preferable and the limits of the preferred aiming method.
The next malfunction exercise has to do with moisture/water droplet distortion. Spray a lens cleaner/anti-fogging agent on the inside of the optic. Of course, this simulates water or moisture getting on the optic while it’s in the holster. For this exercise have the shooters fire multiple successive rounds. For those who have not tried this, I’m giving the secret away and taking away the surprise of this exercise, but the most shocking effect is the water droplets pelting you in the face as you fire the first shot. Could this happen in the field? Absolutely. When the water hits your face it gives the shooter a startle/flinch response and can cost you recovery time for follow through and potential successive shots. Of course, it is better to first experience this in a training environment than in a deadly force encounter.
Lesson #10: The Learning Curve
Transitioning to a MRDS can be “game-changing” but is not a cure-all. Using the MRDS is not a replacement for the fundamentals of marksmanship. I acknowledge that our first academy class trained using the MRDS pilot program had a qualification average of 243 out of a possible 250. The previous academy class average record using iron sights was in the 230s. I consider this improvement game-changing.
Like any new technique or technology there is a learning curve. Considering the instructors, many found it took several thousand rounds using the MRDS to achieve the same proficiency as they had with iron sights. This could be due to the “old dog, new tricks” syndrome or a habit building and eye/brain change that needs training. Recent research indicates we don’t really break old habits, but can build new ones which can override the old ones. That is, if you’re really good at shifting your focus to your front sight and that habit has been ingrained for years of shooting, it may take more time and practice to maintain focus on the target and not the red dot.
Of beginning shooters, or those with little shooting experience, they had a relatively easier time getting to proficiency with the MRDS than those with moderate shooting experience. Target focusing is much more intuitive to the entry level shooter than focal shifting. We gave the students dry fire specific homework which required a minimum of 500 trigger presses a week which was monitored using the MantisX 10. They were issued inert non-firing guns which operated using the same magazines, trigger, reset, etc. and equipped with the same MRDS and iron sights. Anticipation was still an issue, but was less of one. This could be a result of requiring more dry fire practice or using the MRDS.
It is worth noting that a positive attitude affects outcome. There were students who were resistant to the MRDS and lacked the humility to be good learners. It was obvious in numerous ways from direct or overheard comments, attitude, body language, effort exhibited, and performance. Empirically, performance was tracked not solely on final numerical scores, but individual improvement and observable weapons handling/manipulation. Most who embraced the change showed better and quicker improvements.
I suggest reading through the Sage Dynamics White Paper: Miniaturized Red Dot Systems for Duty Handgun Use. The paper goes into detail of the years of research and testing of a variety of MRDS conducted by Sage Dynamics, is in its 7th edition and updated in 2023. For anyone considering transitioning to the MRDS it is a helpful resource and especially pertinent for law enforcement firearms instructors and administrators.
Even with the resources at our Academy and Training Center, it was difficult to find satisfactory answers to certain issues or questions that arose regarding the MRDS. Many of the experienced instructors were not experienced in the MRDS. I contacted professionals in the optical, medical, and engineering fields for their expertise regarding some of the issues I witnessed.
The aforementioned lessons are not all the answers for effectively and efficiently transitioning to the MRDS. I found these lessons to be the most helpful, but the foundation is to be a good learner: Do the research, do the work, think it through. You may discover a better way to deliver the message and help train the next generations of MRDS users.
This post appeared previously on www.adaptiveforceconcepts.com
About the Author:
John Murakami is a firearms instructor and safety/security consultant. He retired after 23 years of Federal service as a Special Agent from the Department of Homeland Security where he was a firearms instructor, defensive tactics instructor, and outreach program coordinator. Mr. Murakami develops adaptable church safety and security planning strategies and provides safety and security related training courses.