Further Adventures With Kydex: Heating and Bending
So we have covered the basic tools to some degree, and talked about safety and careful temperature monitoring. It seemed prudent on my part to go back to videos and see if the information was valid, and there was another lesson to be learned. There is a lot oif new stuff out there from when I stopped watching and started doing. Here’s an error on my part worthy of repair- the videos that got me going are under “phillyedc”, so that should make your searching easier. The next thing that I was completely unaware of is a “channel” called CKK Industries. This gives you literally hundreds of videos involving every facet of the processes required.
Heating Kydex
Maybe I’ve selected to remember things differently than what I saw, in reality. There are several videos where the people just throw the room temperature “cold” kydex in their ovens and pull it out for forming at say 4 minutes. I don’t do this. I preheat the material until it’s fairly pliable, and “cook” it for 3 minutes in the oven, and then start the mad scramble to press/clamp/cool down the material. I’ve seen several people say that in 5 minutes you can start removing the project to start the next steps. In a nutshell, it appears that I’m entirely too stodgy with my particular processes. This doesn’t mean any of us are “wrong”, we just go about our work in different ways.
Looking at their finished projects against my own shows that the end results are similar in terms of definition, so- to each their own. Having said that, I’ll say this- video and reality are very different. A lot of these videos are in say 12 minute snippets, and their finished projects are amazing. Here is something I’ve learned-the hard way.
Maybe I have a horrible toaster oven, but it’s tempermental in comparison to video. I let mine preheat for at least half an hour, and this is why. To get to my desired temp (350), it will go way past that to get there/stabilize. I’ve put material in there during these temperature spikes, and gotten ruined material (glazed, and extremely contracted ) as a reward. I learned this years ago, and that’s exactly why I move slower. These ovens are not precision instruments, so expect fluctuation.
I know I gave you vendors earlier on in the beginning of this fandango, but here’s another one- www.indexfasteners.com. They have all sorts of goodies for you in all aspects of the journey, if you opt to take it.
While my oven is going through all of the pre working rituals, I use that time to get my cuts done, and some of the rough indexing cut marks I’ll be making. This helps me keep my hyperactive self from putting stuff into the oven too soon. As in everything we do, there are times to move with deliberate purpose, and times to let things take their course, and be correct the first time.
So when the oven has stabilized, I put my material on top of the oven, not in it. I put a piece of foam on top of the material, and a scrap piece of 2×6 on top of all that to hold the material against the oven for preheating. Apparently this may be an unnecessary step, but I’ll keep doing it. My oven has a 60 minute rotary dial, and I’ll keep “winding” it so as to not have the timer run out, and start losing heat rapidly.
This has happened too, more than once. I preheat for 30 minutes, and I flip my material at 15 to keep things as consistent as possible. Whether or not it actually makes a difference, I’m not sure, but it’s became part of my mantra. When it’s time to insert the preheated material in to cook, I’ve already got my gloves on in preparation.

I time this to exactly 3 minutes, setting the press and clamps up, and staying right beside the oven. I worry about the fumes thing, and don’t need distractions. At 3 minutes, material is out, in press, object placed, lid on, and clamping starts, most vigorously. It’s far too easy to lose too much heat quickly, and your retention and definition will suffer, as a result.
Here is another tip I picked up, but again, after watching newer video, I’m not sure if this is applicable. Whenever possible, I put the object on top of the oven with the preheating material, too. The idea is that a warm object doesn’t “shock” the material in the press the same way a cold object would. It seems to give me good results, so I’ll keep doing this as well. Maybe I’m hopelessly “old school”, but my results have been good thus far. I can tell you with full authority that a multitool gets pretty toasty, doing this. One more reason to wear your gloves.
Here are a couple more tips, and then we’ll move onto the next portion.
We want the matte, or textured side to be visible to the user, and the slick shint side is the inside. This is where I draw arrows and words as cues, in pencil, to remind me to do things correctly. I also sketch the outline of the pistol or whatever to assist in accurate centering. If you have a real job, and tinker with this on the side, there are times when you’ll be tired. It’s all too easy to make mistakes, and have to start over. I try to avoid this.
Glazed Kydex
I probably mentioned it earlier, but this stuff is pretty forgiving. You can reheat it, and correct mistakes. However, if you glaze it, Game Over. Throw it away, as you’re wasting time and electricity. It’s likely a safe bet that every person out there has done this a few times, so don’t let it destroy you if it happens. Mistakes are learning opportunities, and we’re not exactly launching shuttles, here.
If you’ve ever seen a grease spot- for example- potato chip grease on a piece of paper, you get the idea. Glazed Kydex looks…well, glazed.This equals a degradation/weak spot. It’s also cosmetically unappealing. If I ever glaze material now, it’s when I’m using the heat gun for fine detail work. I’ve pretty much negated it from the heating/forming stages, but glazing can happen when I bend my curves so the project fits the hip. If not mentioned previously, be careful heating with the gun while bending curves. In my process, this is one of the final steps. After bending is when I attach eyelets, and then whatever hardware, like loops or clips.
I’ve not watched every video out there on holster making, but I’ve watched many. One thing I find extremely interesting is that the pros don’t show this in their videos (I could very well be wrong, just haven’t seen it). There is nothing worse than being so close to completion, and torching the material making it potentially weak, ugly, and unusable. I’ve done this, more than once, believe me. This is why it’s so important to keep the gun close to heat, but not too close. Just as important as distance is keeping that gun moving. Loitering in one place can easily equal failure. You need a surface to lay that heat gun down fast, once it’s time.
A scrap piece of plywood is excellent. Have this pre positioned, because when it’s time to set the bends, that material is rapidly cooling, exposed to open air. Along with the topic- here is how I bend in the curves- I use a dowel rod. To be precise, it’s a 6 inch piece of 1and 1/4 inch dowel. I figured this out completely by accident. If I’ve not stressed this enough, wear your gloves.
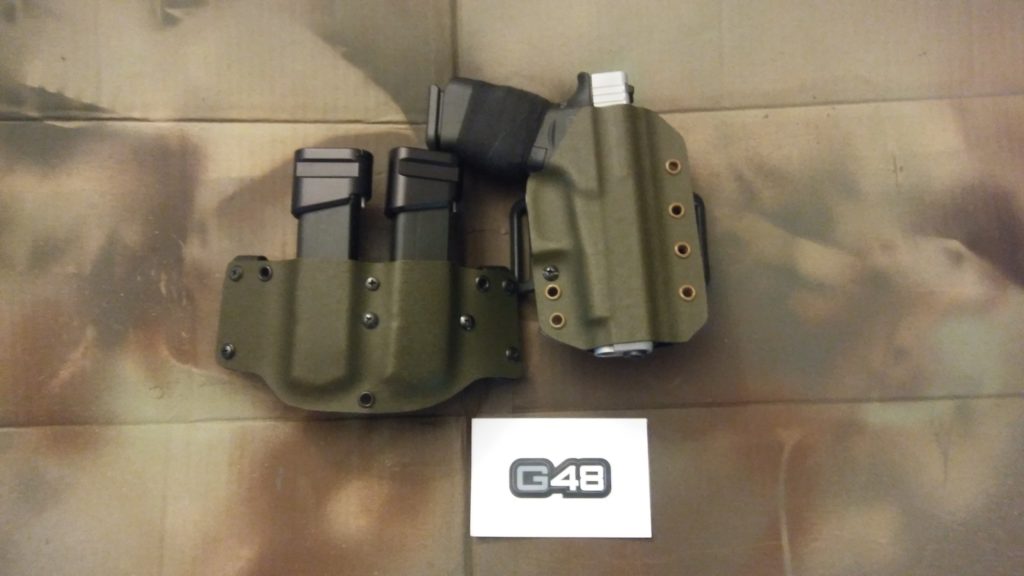
Glock 43 Holster and mag pouch made by the author.
Here is the Tale of the Bend.
Again, having recently watched newer videos to assist you out there, my method is old. There is a new way to make curves, but only if you use a vacuum press. This device is called a HD Curved Jig. It appears to be a solid piece of wood rounded to match the curvature of a human hip. If you’re using a plywood press like me, we can’t use this. If you’ve decided to take the vacuum route, you’re welcome.
Another thing I saw was people using heated tee shirt presses for the Kydex. This looks fantastic, but is likely very expensive. Anyway, we were discussing bending curves.
If you don’t make the holster curve, it won’t hide for beans. This kind of defeats everything we’re trying to do. For years I used the welding pliers, seamers, etc, with varying degrees of success. I rarely got things right the first time, and glazed a few projects along the way. I was making flashlight sheaths like crazy at the time, and a piece of dowel was on the table. This was the inspiration, and it worked.
Here is yet another tip- when it’s time to bend, have the object in the project. Otherwise, you’ll bend something out of whack, and the item won’t fit correctly. This gets frustrating, fast. Bonus- on the videos, these guys are putting in eyelets, and pressing them down early on. This is one of my final steps. I’ve got my item screwed together, so the bends are clean, and the rig is sturdy. Once it’s cool, I can sand it, and take everything apart and clean it out, THEN insert eyelets. Here’s a reason why- Screws and eyelets get very hot very fast while you’re working on bends (wear you gloves, kids). Eyelets are aluminum, and will distort your holes in the Kydex. For whatever reason, I’ve not had this happen with steel screws. You would think it would be the other way around, but not in my experience. Maybe because the screws don’t heat as rapidly, thus making deformation less likely. We were talking about bends.
So there I am, getting ready to make the bend. Ground the heat gun, only to find the welders pliers out of reach. So I grabbed the dowel, rolled the bend against it. The dowel was pressed against the holstered gun, and the bend looked amazing. I then held it that way, and let it cool. You must hang onto it for a couple of minutes to let the cooling begin, and the bend to “set”.
At this point- here is my method. I now have a good bend, and it’s cooling. I let it cool for half an hour, with the object still in the project. I’ve messed up the second bend, way too many times, and this is why. Heat is traveling through the Kydex as you make the initial bend. If you just go for the second, the first might not have taken a hard set, and now you’re messing with the other side.
What usually happens is you get two half assed bends that will likely work, but not as well. Taking my time allows me to get each bend executed nicely. If you’re wondering, I don’t bend say the front (sight channel area) first, second bend (by the pistol grip) later. I simply bend whatever end is being heated with the gun. I don’t feel it makes a huge difference, either way.
Here is a practice you should not ever do. It’s just plain dangerous, so you need to be aware. I had a coworker a few years back who was making some pretty cool stuff- but, he would heat the trigger guard area, and use the actual trigger of the gun to form against to get “additional retention”. Can you see how this could get you injured? If not- I’ll explain- retention on say a Glock, comes from that square trigger guard area. As the holster is molded, that is just a great “pinch point” for the 2 halves to really hang onto the pistol. This guy was heating around the trigger area, and pushing in the warm Kydex to pinch against the trigger. I’m sure you see clearly now how this is just plain crazy.
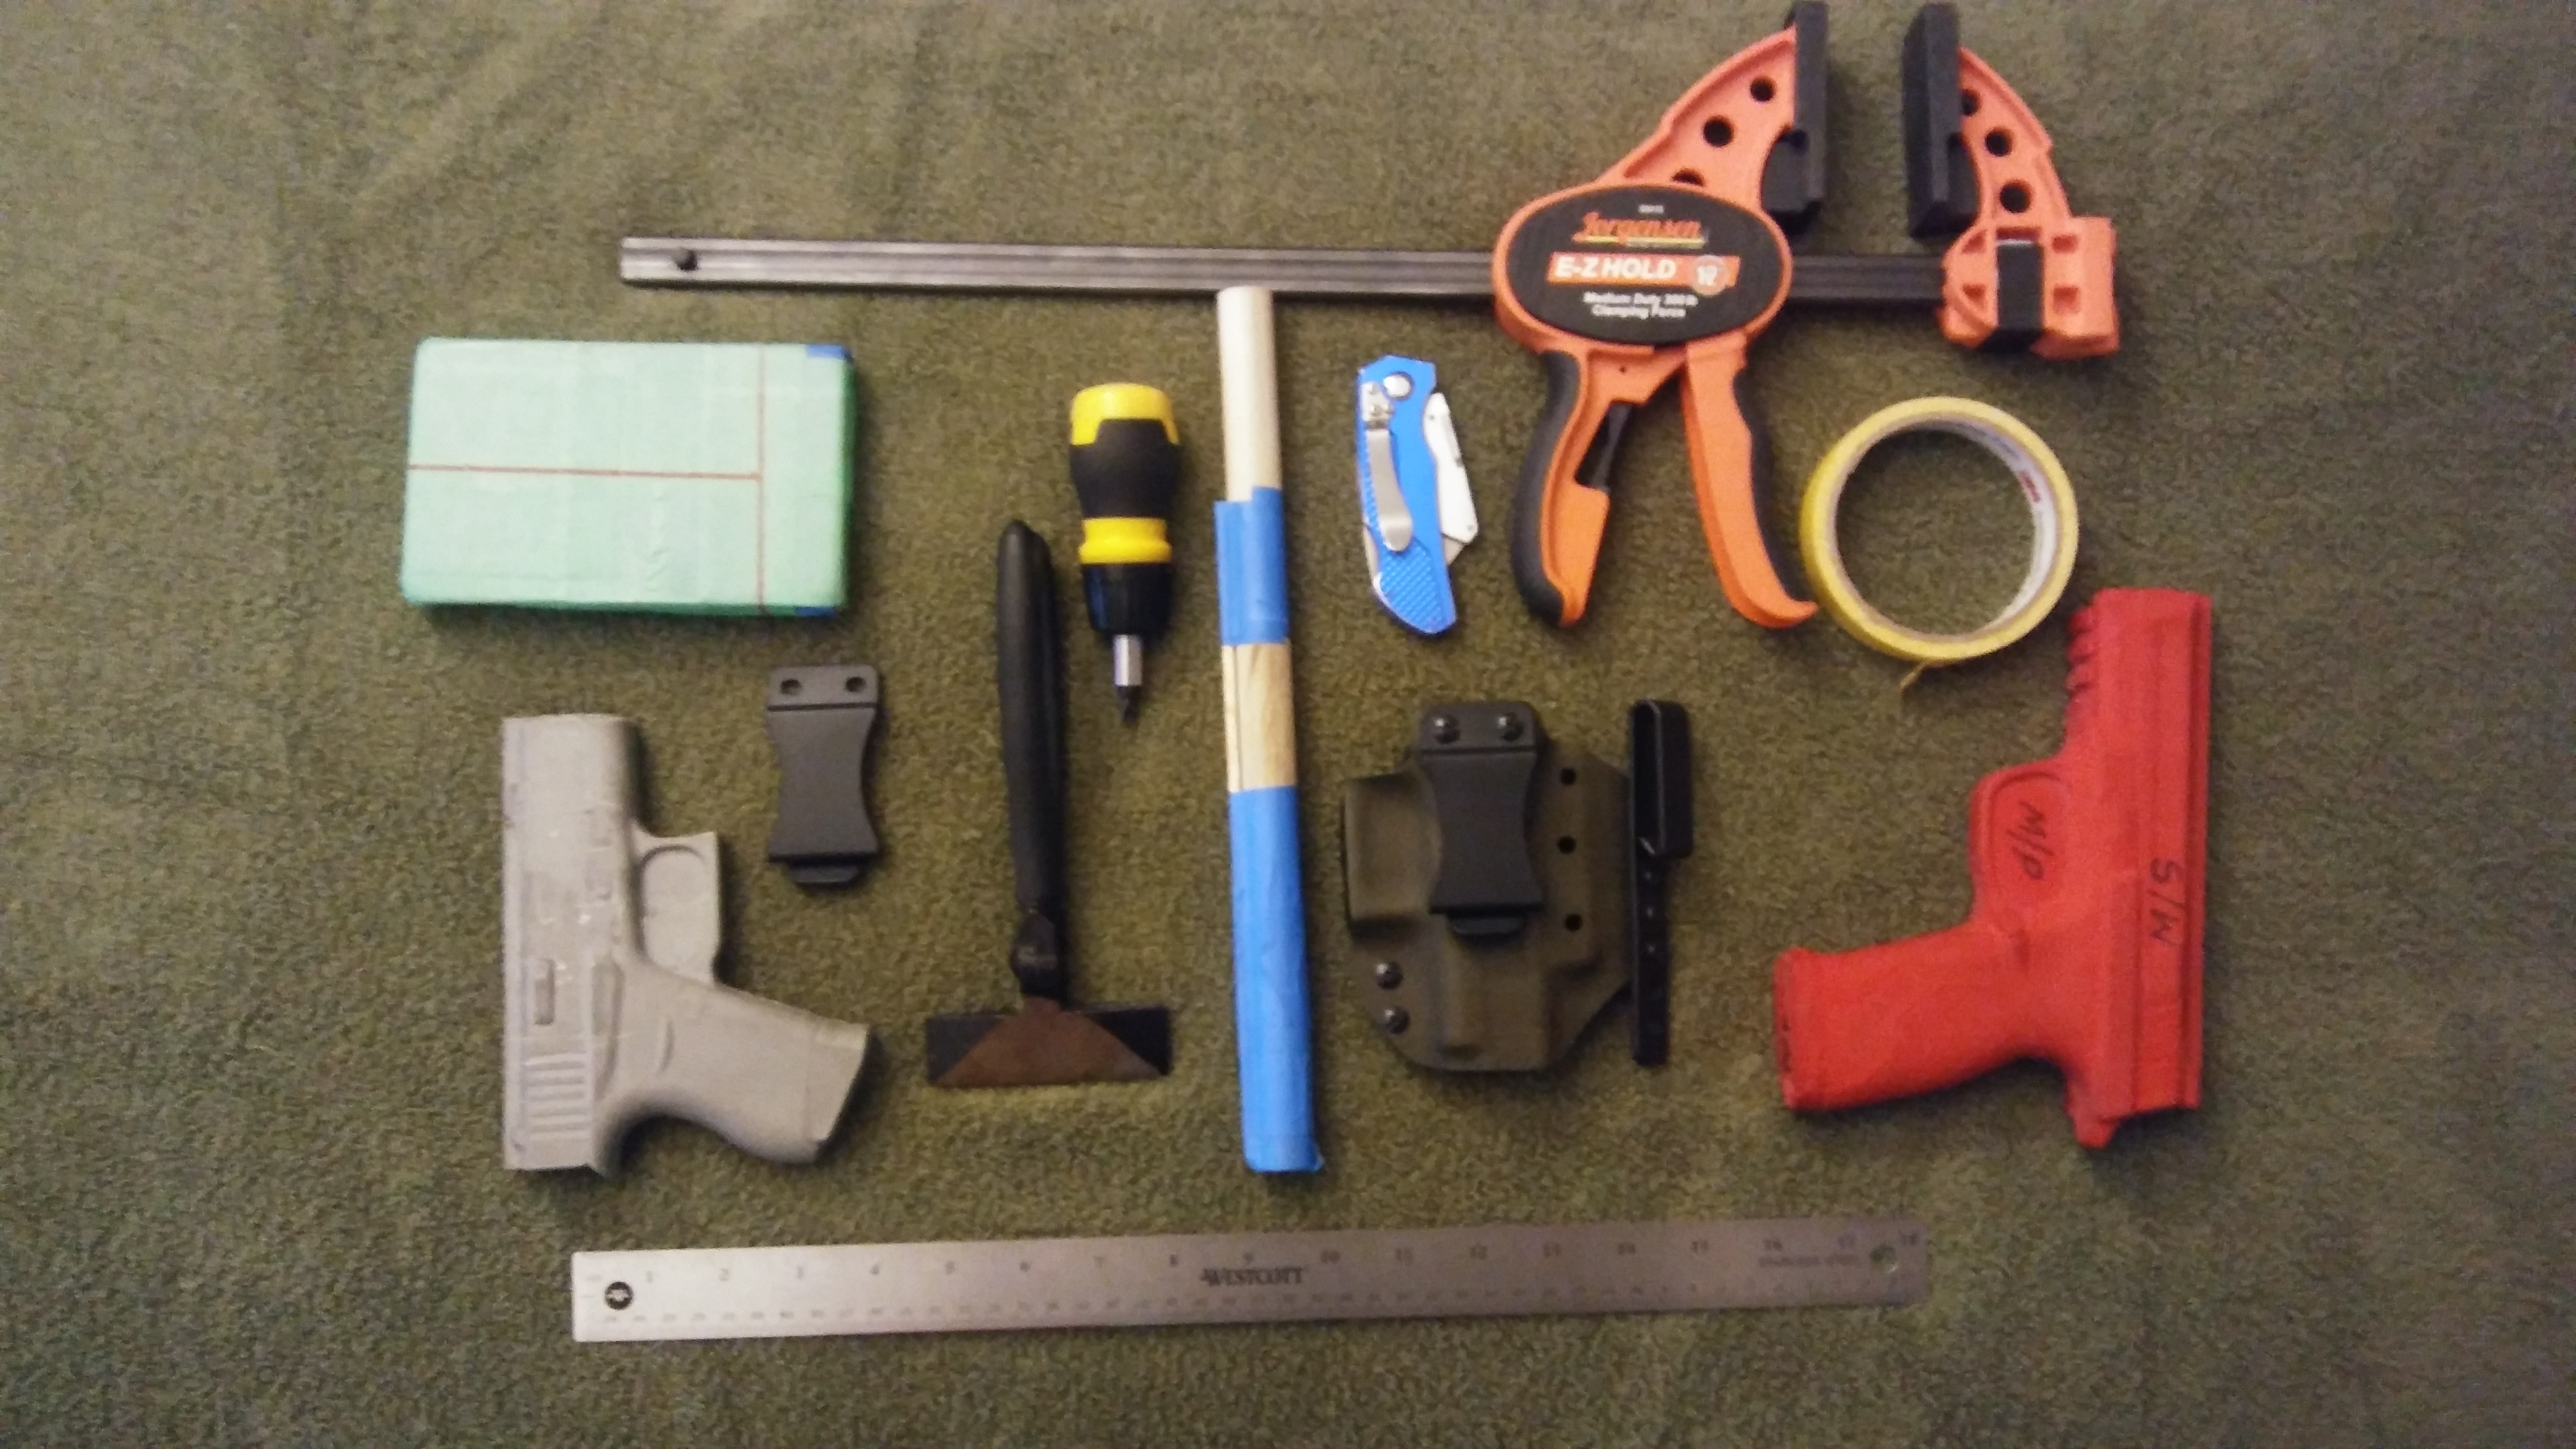
Featured image: Kydex tools by Robert Johnson